Welcome to ScapeCrunch

We are ScapeCrunch, the place where planted aquarium hobbyists come to build relationships and support each other. When you're tired of doom scrolling, you've found your home here.

Journal High-Tech 90P Build

So I've figured out my space limitation/controller mounting issues after going over dozens of scenarios.

In the end, it was simple, it's the LED psu/drivers that were the bulkiest and pushing everything else out, either the sump outward which cascaded onto moving everything else.

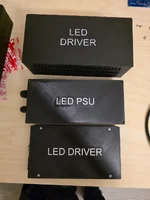
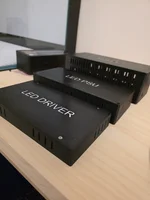
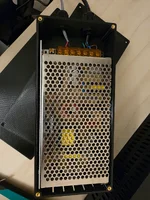
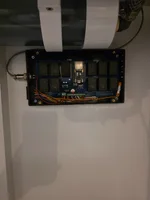
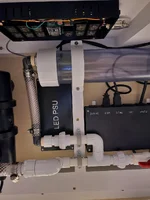
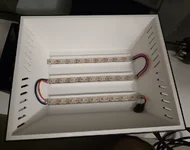
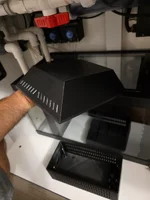
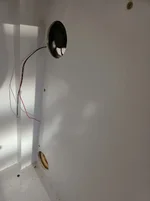
So, I changed the led box. Instead of one big box, I split the driver board and PSU, made both a lot slimmer, and allowed one to be mounted up top, and one on the back wall.

Old on top, new ones below.

20260914_192344.webp20260914_192348.webp
20260914_193319.webp20260914_212239.webp

20260914_212249.webp

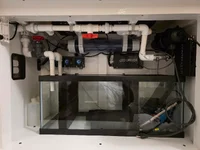
Current state of the cabinet:

20260914_222543.webp

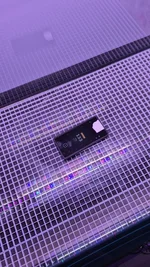
I also quickly put together the small fuge light with the leftover led strip. I didn't like the look of the printed white on the outside, so I also printed a thin black cover that slips onto this one.

20260914_222905~2.webp20260914_222913.webp
 
Last edited:
Are you concerned about heat in those boxes or overall in the stand, plus moisture/humidity from the sump? It almost seems like you wouldn't need that heater.
Yes and no...

Most the electronics will run cold-warm, and wattages dissipated are not very high.

LED PSU - ~ 18W at full 100%
LED Driver - ~ 12W @ full 100% (NLDD Drivers are ~92% efficient, so we lose about 8% of the 146W as heat)
Backlight PSU - 7W @ full 100%
Powerbar - 5W
Controller - < 1W
Power Bricks - <2W

Total heat - 45W

Keep in mind that is all at worst case. Practically, the LED isn't going to be run that high, nor will all colour channels be on at the same time. Same thing with the backlight. In reality, it will likely be about ~30-35W of heat during daytime, and considerably less when lights are off.

Having said that, moisture + heat + enclosed cabinet is asking for a bad time, so I did add a ventilation fan + intake vent on the right side of the cabinet that vents into the desk kneehole area.

1789485404354.webp

This will run on/off based on a temperature/humidity sensor inside the cabinet off the main controller.

Whether or not I actually 'need' the heater is to be seen. Winters do get quite cold here though. I'll post the data here once I gather enough of it after the system is running.
 
I know many here, are fans of photone, but I just could never get consistent trustworthy readings with it, nor do I like the idea of putting my phone in an aquarium.

I bought one of these VBR-Aqua IP68 PAR Meter for Aquarium and haven't regretted it. It may not be worth it if you only have one tank, but if you have many, what's another $100?

Edit to add: The reviews regarding the telescoping rod, no longer apply, as the one I received came with a 3 piece screw-together rod.
 
I know many here, are fans of photone, but I just could never get consistent trustworthy readings with it, nor do I like the idea of putting my phone in an aquarium.

I bought one of these VBR-Aqua IP68 PAR Meter for Aquarium and haven't regretted it. It may not be worth it if you only have one tank, but if you have many, what's another $100?

Edit to add: The reviews regarding the telescoping rod, no longer apply, as the one I received came with a 3 piece screw-together rod.
I always thought the cheapest par meter was $300-500. Will buy the minute it goes on sale.
 
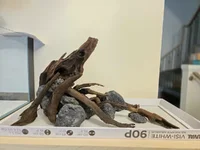
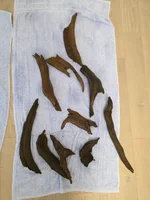
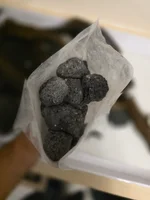
I've made a bit of progress that I'll update on later, but in the meantime I've started playing around with the hardscape a bit, this is the part of the build where I'm least confident. I'm fully open to suggestions, I have another 10 pieces of driftwood and a bunch of smaller lava rock available too, but ended up pulling them as it started looking like a pile of rocks and sticks.

20260926_180914.webp


20260926_181245.webp20260926_181338.webp
Please help!
 
It is indeed the hardest part… but I think its the best part! Pump the brakes and think about your end goals and what type of planting areas you want first. Let that inform how the hardscape fits into that vision first.
If that leads things in the right direction great! If I get a bit hung up I start looking and reading about composition types and draw inspiration from builds with similar hardscape. Easy to go out to instagram/past competitions etc and window shop so to speak.
I think given the awesomeness that this build has entailed so far that the initial hardscape deserves time to develop and feel right.
 
It is indeed the hardest part… but I think its the best part! Pump the brakes and think about your end goals and what type of planting areas you want first. Let that inform how the hardscape fits into that vision first.
If that leads things in the right direction great! If I get a bit hung up I start looking and reading about composition types and draw inspiration from builds with similar hardscape. Easy to go out to instagram/past competitions etc and window shop so to speak.
I think given the awesomeness that this build has entailed so far that the initial hardscape deserves time to develop and feel right.
Sage advice! Definitely trying to make things intentional and not rush into any one aspect. I'll be getting the substrate into the tank in the next couple days and will try to play around a bit in there - I'm not a super visual person so need to actually lay things out sometimes which is especially hard when selecting plants.
 
Definitely. You can see a little of my layout struggles early on in my journal as I was dead set on using a chunk of wood that took up waaay too much space. For me it’s hard to work with stone/wood without having the substrate or anything to create mounds or slope. It’s surely something that I like to approach when I have plenty of time and can chill without feeling like I have to get it done.
Hope you can hit it when feeling nice and creative!
 
Not a bot (we have to say that now, right? 🙃)

Some updates as promised on the build. Still not scaped btw - but hoping to get some time this weekend.

First thing is I knew I wanted a Time of Flight sensor in the sump for an accurate level measurement for the ATO, AWC trim, possibly see filter fouling, and as an extra safety layer. The big question was how to seal it from moisture.

I figured the easiest way would be to seal the sensor inside a printed case, with some desiccant, and a glass cover. Attempt 1 went horribly as the printhead collided with desiccant and then dragged it across the pcb destroying my first sensor.

Attempt 2 went much better as I made the box deeper, and siliconed a glass microscope cover slip to it.
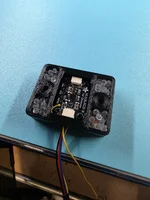
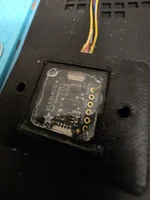
WhatsApp Image 2026-10-02 at 10.24.48 AM (10).webp WhatsApp Image 2026-10-02 at 10.24.48 AM (9).webp

But - this didn't work, since I increased the gap from the sensor to the glass - there was some crosstalk with the glass reflecting some of the signal. So on to attempt 3. This time I skipped the desiccant entirely having failed the first 2 times, and printed a small adapter to limit crosstalk, and covered it with an iphone camera glass, then expoxied the entire pcb.
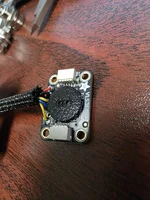
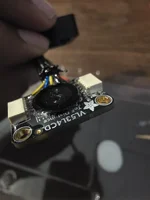
WhatsApp Image 2026-10-02 at 10.24.48 AM (6).webpWhatsApp Image 2026-10-02 at 10.24.48 AM (5).webp

This worked, and no worry about moisture killing the sensor! I installed it in a stilling well so any turbulence is smoothed out, also pictured is a FSIR02 sensor for triggering an emergency if the sump level ever went too high. Also a mounting hole for the glass pH probe so its somewhat protected from me.
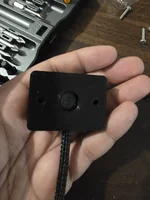
WhatsApp Image 2026-10-02 at 10.24.48 AM (4).webpWhatsApp Image 2026-10-02 at 10.24.48 AM (3).webp

I then also got these nice flood sensors from aliexpress that I mounted on both back corners of the cabinet. I like them a lot as they can be mounted with the pins in any position and they feed right back to the main controller to shut off the pump if needed.
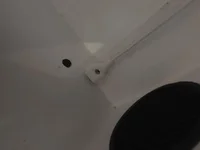
WhatsApp Image 2026-10-02 at 10.24.48 AM (2).webp

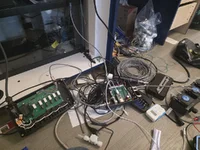
Then began the wiring and testing....
WhatsApp Image 2026-10-02 at 10.24.48 AM (8).webp

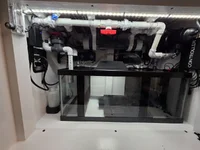
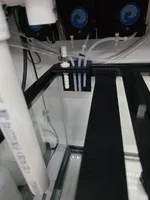
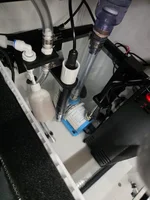
This easily took many evenings to get done, but I finally (mostly) got everything in a state that I'm okay with.
WhatsApp Image 2026-10-02 at 10.24.48 AM.webp

ATO supply + fert dosing. Also not pictured is the liquid sensors on each of the 3 bean animal drains, and one on the chamber 1 glass to detect if the first filter is in need of cleaning.
WhatsApp Image 2026-10-02 at 10.24.47 AM (4).webp

ATO + flow sensor, extra mechanical float as backup layer, AWC Pickup, EC Probe, Return Pump, Low float sensor, temperature probe, and stilling well (FSIR02 high level, pH probe, ToF sensor).
WhatsApp Image 2026-10-02 at 10.24.47 AM (3).webp

I also got the first version of the weir box printed, and used a small o-ring to seal it against the bulkhead so its a press-fit and still removable.
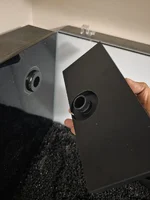
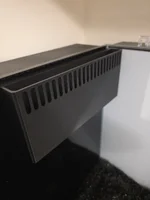
WhatsApp Image 2026-10-02 at 10.24.47 AM.webp WhatsApp Image 2026-10-02 at 10.24.47 AM (1).webp

After this - I really wanted to address the loc-line fittings that I showed before that I absolutely hated the look of.
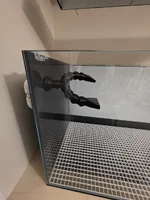
WhatsApp Image 2026-10-02 at 10.24.48 AM (11).webp

I ended up ordering a bunch of different tubing and fittings from Aliexpress to try and put together something better. First up was clear acrylic - I didn't mind this too much, but it still looked bulky to me, and wasn't too sure about the clear.
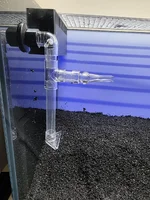
WhatsApp Image 2026-10-02 at 10.24.46 AM (4).webp

I then tried a set of black - which was decent, and blended in a bit more - but still a bit obtrusive.
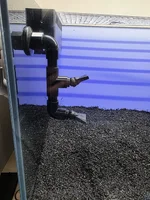
WhatsApp Image 2026-10-02 at 10.24.46 AM (3).webp

In the end, I went back to my trusty printer and modeled up something a lot sleeker. It's a 2 piece design, the first spins onto the bulkhead, and has a recess so it fits flush against the glass. The second has a tab and tightly clicks into place with 3x 6mm jets, with the top and bottom one angled upwards about 10degrees or so.
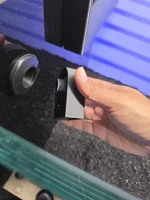
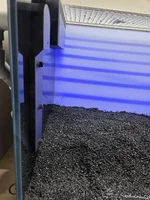
WhatsApp Image 2026-10-02 at 10.24.46 AM (2).webpWhatsApp Image 2026-10-02 at 10.24.46 AM (1).webp

A LOT sleeker IMO, time will tell if the flow will be adequate (orst case, I can fall back to one of the other options)- but the beauty is I can print out revisions as needed within a few hours. And as a bonus, if I see the need later - I put in small recesses on the side of the jet channel that will accept a moss holder if I really want to hide it more.
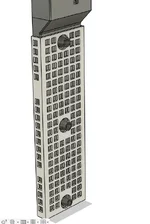
1790952865643.webp

The sump area is pretty much done with the exception of lines to the fert bottles, and final overflow pvc pipe termination in the sump. I may also swap out the main LED power supply as my smart plug is showing an idle draw of about 7-8W being an older unit (modern units being <0.25W) - so less waste, less heat in the cabinet. It would be ideal to do it now before the plumbing has water in it.

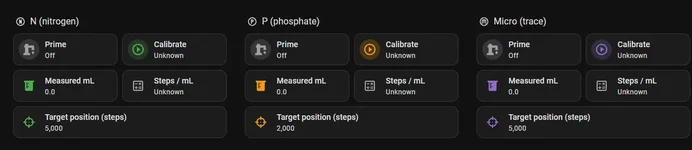
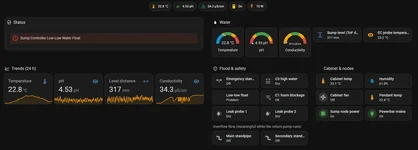
I've also got a start on the home assistant dashboard - but still some things to sort out:
1790953252066.webp

1790953300361.webp

Also have a display of sorts in the works - probably not at all necessary, but for the fun factor. More on that next time. I think I'll need an entire thread to explain all the automations, and why certain sensors were picked.

Otherwise, substrate is in the tank - and the basement mixing/co2 cabinet is done and painted - so work will begin down there soon too. Starting to see the light at the end of the tunnel!
 
Last edited:

Top 10 Trending Threads

Back
Top