Welcome to ScapeCrunch

We are ScapeCrunch, the place where planted aquarium hobbyists come to build relationships and support each other. When you're tired of doom scrolling, you've found your home here.

Social Feed

Art
Art
Staff member I Donated 2026 Founding Member
· posted in Media of the Month Forum
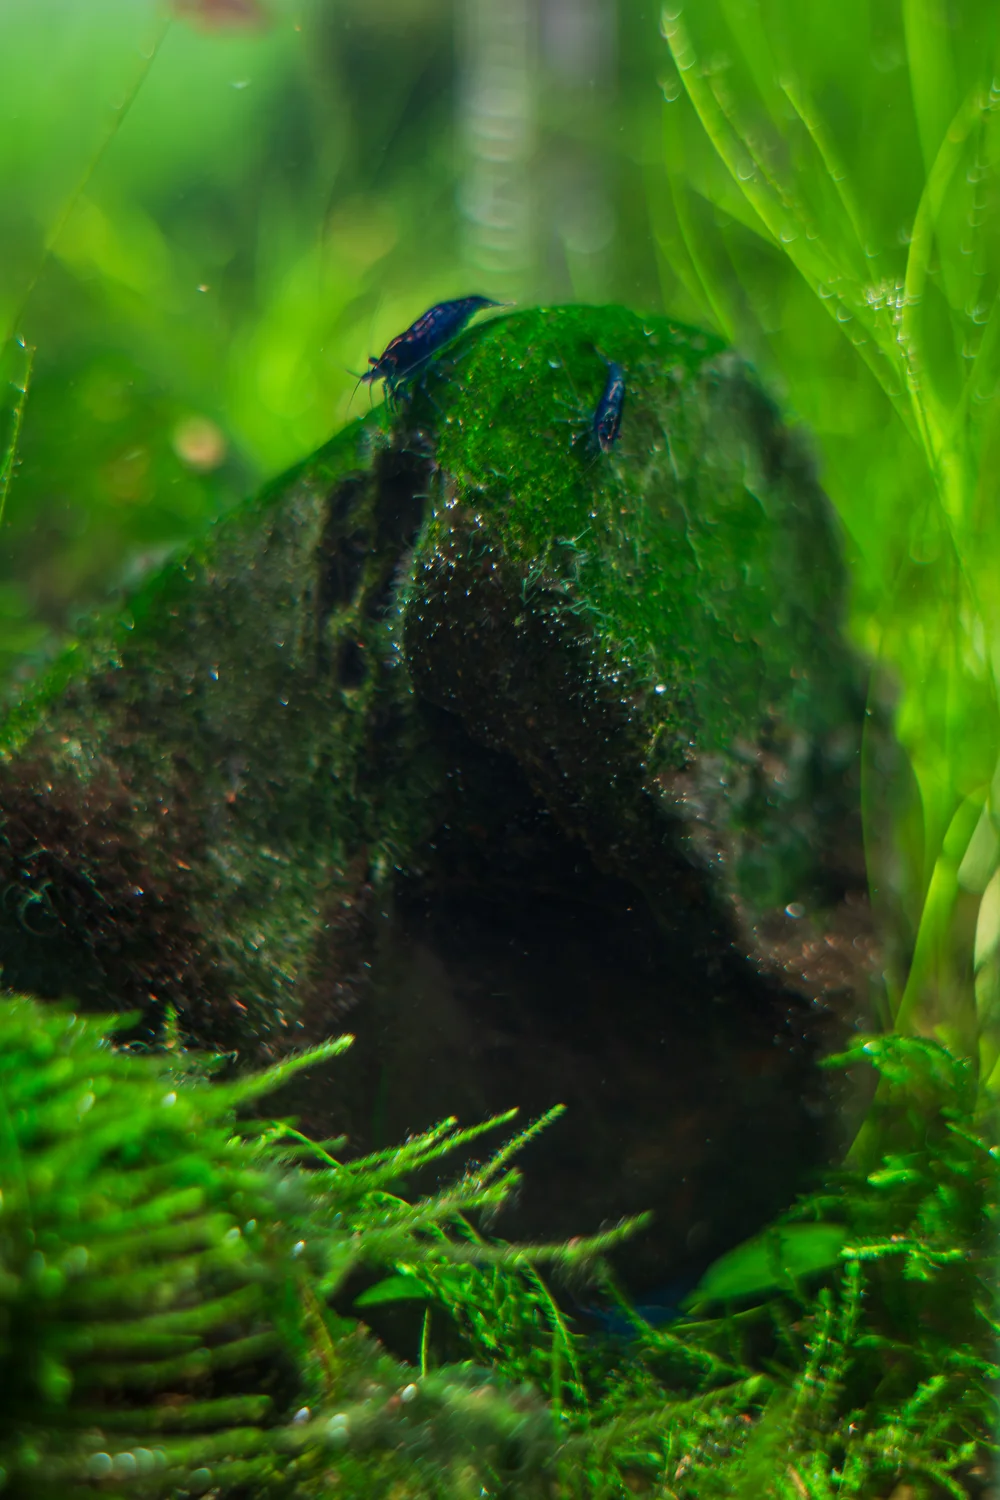
The theme for this month's contest is: Shades of Green

Please take a picture of shades of green in your aquarium. Be as artistic and creative as you like.

The rules:
  • Submissions are allowed between August 16 and August 23.
  • Voting will start on August 23 at 12:01 am Eastern time.
  • Voting will end on August 30 at 11:30 pm Eastern time.
The prize:

A $25 store credit from BurrAqua thanks to @Burr740!

Good Luck!
0 Replies · 36 views
  • Like
Reactions: Kwyet
HardeeParty
Last reply · posted in Journals
Time to start a new thread.

I’ll fill in some details later, but I’m working on the hardscape now. Any and all criticism is appreciated. The vision is nothing more, and nothing less, than something appealing to the eye.

90cm x 30cm x 30cm Lifegard Aquatics ultra clear bookshelf tank. Buce and anubias on the hardscape, stems towards the back and center, mid to front carpet with some changes in shade and texture down to a flat grade on the right side of the tank.

Lily pipe inlet and skimmer will be in the back left corner with the outflow in the front left to hopefully achieve circular flow. I’ll be running an in-line diffuser. Light will be the P600 Pro that I regrettably did not upside to 900. Oh well. I’ll mount it high and hopefully it’ll have enough spread.

I have some dragon stone and red lava rock rubble I’ll use at the base to blend into the substrate, as well as some stratum I may or may not cap with.

IMG_1824.jpeg


IMG_1874.jpeg

IMG_1877.jpeg
IMG_1876.jpeg

IMG_1875.webp
236 Replies · 25356 views
Art
Art
Staff member I Donated 2026 Founding Member
Last reply · posted in Forum News/Feedback
This is the future home for the announcements when someone obtains an achievement badge. Let the games begin!
2030 Replies · 50170 views
  • Like
Reactions: Kwyet
MrJG
Supporting I Donated 2026
Last reply · posted in Journals

Journal  MrJG - UNS 90L

@Sb1415 Apologies I totally snagged the format of your journal post for this so thank you!

Many moons ago I was an active and contributing member on plantedtank.net, I think at one point I had around 14 scaped tanks going before burnout and life changes. Instead of weekends consisting of maintenance I transitioned to camping/boating and life has been great. I’ve always missed it. After downsizing and making a move to a new home I kept only a small 12x12 cube tank that started life as an amateur iwagumi layout, Seiryu and hairgrass only. I put it on the nightstand beside my bed and added some of my favorite Anubias and crypts from taken down tanks. Its been sitting there running for 5-6 years now, low light, top offs only w tap. Maintenance when it got out of control. Super old aquasoil now flattened out to a thick 4-5 inch thick layer in a perfect line front to back.

In Aug/Sept 25 had a bit of a health issue that kept me in bed for several weeks recovering while I looked at this sad little cube, mostly healthy but not truly thriving. No fertilizer being added for years, GDA covered anubias leaves that also were many years old and I thought to myself I should make this better… that was the tipping point. OK I’ll do a deep clean on the substrate, get some stems to throw in there, maybe get a carpet going. Tissue cultures/stems ordered and I got to work. No more top offs, 10% water changes instead. TDS ~900 when I started. Ultimately everything melted back and didn’t grow well. I’d been keeping the lighting so dim all these years to maintain just the crypts/epiphytes without it turning into a mess and I was ok with it again. That was the spark.

IMG_6663.webp

I decided I wanted to build out a new tank, most of my old hardware/tanks I had let go of in a bulk way so I was going to have to start new with everything sans some 5 gallon buckets of Amazonia that I’d placed in the basement of the new house.. Phoenix rising from the ashes? Most likely more like algae emerging from the depths. I still consider myself a beginner and maybe amateur at best so yeah…

So I got to work again reading, researching, what’s new, what has changed since I’ve been out of the loop for so long? Ooo dark start that sounds much better, in line CO2 diffusers cool! CO2 reactors, pretty awesome sounding, 2Hr aquarist read every article, and I’m back in baby!

Tank inspiration

None really hence no name, it fit right into a slot to occupy my mind from a not so great situation that I was in and I’m ok with that. Ultimately I’d like this to be a low-mid energy tank that can have minimal amounts of weekly maintenance while still looking the part. I’d prefer to keep it as simple as possible while still having some high tech bits. Get all the equipment out of the tank, co2, low-mid level lighting, minimal/simple fertilization. I got busy ordering equipment and started brainstorming layouts and what hardscape materials I could find. Instagram was my friend for a while, seems that everything that kept grabbing my attention were island style layouts with a very thin layer of sand surrounding. I’ve also always been partial to big chonky pieces of driftwood, I thought to go the manzanita route but wysiwyg pieces were fetching stupid prices. I ran across this ironwood in a listing and couldn’t let it go. The deep lines in the bark were just calling me so I quick snap ordered it before my brain could process dimensions, I knew it would fit but didn’t fully visualise how much it would ultimately limit the layout. I wanted to stay mostly inert with stone and eventually/begrudgingly ordered the tumbled lava stone with the intention of keeping it to a island/river layout style and mimicking some of my found instagram muse tanks. It will mostly likely end up more nature style although the start will be more Willy Wonka than anything. Thanks @Burr740 for that, I shopped like a kid in a candy store.

Equipment

Tank
  • UNS 90L
  • 90 cm x 30 cm x 30 cm
  • 79 liters or 21 gallons by volume, 62.5 liters or 16.5 gallons actual w hardscape
Filter
  • Oase Thermo 200
  • Replaced the charcoal media with more ceramic from Oase
  • Replaced w Fzone stainless steel -Fzone glass Lily w skimmer ⅝”
  • Replaced tubing with UNS pro tubing ⅝”
  • Fzone Quick release ⅝” so Lily pipes can be cleaned without having to reprime filter
CO2
  • Gla inline atomizer - replaced Fzone Co2 inline diffuser ⅝”
  • GLA dual stage - replaced Fzone pro series dual stage regulator w/ 5lb tank
  • Timed on 3 hours before lights on, off 1 hour before lights off
Water
  • Using distilled by gallon, remineralized with salty shrimp GH targeting GH around 4-5
  • Hoping for 0-1 KH
  • Dark start cycled with prime dechlorinated Tap and APT Start
Substrate
  • 80% old used ADA Amazonia v1, small bits sifted and bagged to create slight slope
  • 2HR Feast topped to around 2 inches
  • UNS Bora sand
  • UNS Kona pebbles
Lighting
  • Fzone Bright 90 - 90CM
  • Before hardscape made rough par map using photone with diffuser iPhone 15 Pro
  • At 100% top 404, mid 219, base 127 PAR
  • At 50% top 190, mid 110, base 62 PAR
  • Will be starting tank with 45-50% lighting intensity
  • Timed at 3pm-9pm photoperiod with 60 minute ramps
  • Current Colorcast LED strip w/frosted background
  • Timed scenes for dawn (orange 1 HR during pre-ramp) /daylight (green during ON cycle) /sunset (red 1 HR during post-ramp) /night (indigo 1 HR after lights out)
Hardscape
  • Arizona Ironwood
  • Black tumbled lava stone
Ferts
  • APT 1 and 3 dosed at recommended levels per calculator
  • APT Jazz - in 3-4 months as Feast gives out
  • Trying to keep it simple with fertilization to start
Current status, ending dark start, overcast next few days so removed the cardboard surround last night. Took today off work and anxiously awaiting a fed ex delivery with a big box o plants. Here it is in “night” scene mode.

IMG_6920.webp
40 Replies · 3115 views
Burr740
Sponsor Expert in Residence Rockstar
· posted in ScapeBid discussions
0 Replies · 24 views
Mr. Silly Goose
I Donated 2026
Last reply · posted in Journals
Inspiration, Goals, & Considerations

I've had an interest in aquariums since a young age and had my own aquarium with fish like Angelfish and Mollies around middle school. Growing up, my dad had a bigger tank with Blood Parrots and Silver Dollars. Over 10 years ago, I had a low maintenance 55 gallon planted tank. I was pretty proud of it, but always envied the high tech tanks I saw on forums/social media and told myself when I broke that tank down that the next time I set up a tank, it would be like what I envied. At the end of 2024, I set up a small low tech 5 gallon planted tank to help scratch my aquarium itch, which really only reaccelerated my desire for setting up a high tech tank. And now, here we are!

The size of the tank was mostly dictated by the space. I originally planned on something around 30 gallons, but my LFS had the UNS 75P in stock and after measuring and discussing with my wife, we agreed it would work for the space. The tank is between the kitchen and living room, which is essentially a play area for my son, so lighting needs to be adjusted to make sure he's not blinded by the light when looking up at the tank.

Generally, I'd like to have a visually pleasing aquarium with lots of fish and plants that's peaceful to enjoy. I'd like to automate / reduce as much friction as possible and I realize there's still plenty I need to learn, so I'll need to have patience when things go wrong. I want to keep away from anything that's hard to get out of the tank once it's in (duckweed, moss, pest snails, etc). I felt like sharing prices below might give value to anyone in the future that's looking to start where I did with a high tech tank.

Specs (prices include sales tax)
Tank:

UNS 75P (8mm Glass - 29.52" x 17.71" x 17.71") - $519​
Lid - Working on getting a custom lid made​

Lighting:
Chihiros WRGB II Pro 60 - $263
Chihiros WRGB II Pro Shades- $40
3D Printed Side Shades - Still need to do this
Chihiros Hanging Rope Kit- $37
Chihiros LED Lights Hanging Stand Kit - $64
The mounting screws provided protruded beyond the bracket and would not fit with the backlight. I ended up getting washers and placing them outside the bracket to limit the screw depth.​
Really disliked the fact that the stand was branded with Chihiros and visible when looking into the aquarium.​

Filtration:
Oase: 60 ppi prefilter, 2x 30 ppi, _x 20 ppi - $56 (spares)​
Oase tubing - Included with filter​

Co2:
Misc. 10lb Cylinder - $118 (includes CO2)​
CO2 Art PRO-SE Regulator - $105​
Aqua Rocks Colorado Small Yugang Reactor 19mm w/ 90 degree elbows - $150​

Inflow & Outflow Pipes:
Aqua Rocks Colorado Lily Pipe Clipper - $11​

Substrate & Hardscape:
UNS Controsoil - Black, 'normal' used as a base and ‘fine’ on top - ~$129​
CaribSea Super Naturals- Jungle River Sand (foreground sand) - $42 (only used a small mount of the bag - will user remainder in upcoming tank)
UNS Controsand Santa Fe (used as accent around dragon stone) - $57 (only used a small mount of the bag - will user remainder in upcoming tank)
UNS Controsand Sequoia (used as accent around dragon stone) - $52 (only used a small mount of the bag - will user remainder in upcoming tank)
I was surprised how dirty these rocks were and how much rinsing was required. For the price point, I felt like they should have come pre-washed.
Driftwood & Dragon Stone from Aquarium Co-Op - $111​

Fertilization:
Burr Aqua Micros and Macros​
Battery Backup & Power
EcoFlow DELTA 3 Max (2kwh) - $680​
Unfortunately prolonged power outages are not uncommon for us. We've been without power for multiple consecutive days, 7 days being the longest. This battery backup gives me some peace of mind knowing the tank can run for some time uninterrupted giving me the flexibility to get the generator out and running at a later time, refill with gas, etc. I believe run time will be around 12 hours.​

Other Misc Equipment:
Chihiros CO2 Drop Checker
5 x Oase ShutOff Valve 16/22
Inkbird WiFi ITC-308 - $38
SwitchBot Leak Detectors - $15 each

"Stand"
Because the guts are located in a kitchen cabinet, I didn't want to screw directly into it and damage it. I was also concerned silicone would not be able to dry and outgas properly when sealing the edges. I opted to line the cabinet with contact paper. It's essentially a giant sticker, so I lined the sides, bottoms, and a second layer over the bottom edges/joints. I built a 3 panel "stand" inside of the cabinet so I could house everything and screw into the plywood without any concerns. I used 1 sheet of 3/4" Maple plywood and coated 1 side with a latex primer followed by a layer of latex white paint. This is mostly for water resistance and not necessarily water proof. I placed a silicone cabinet liner under the right side equipment. I made a shelf to place the EcoFlow on so if there's a catastrophic leak it's off the bottom.

One consideration I hadn't thought about was how "cramped" the cabinet would be since I placed the EcoFlow on a shelf with a "wall", which essentially made the work area much tighter.

Cable Management: Raceway and cable clips
Water
Express Water RO5DX - $160
I saw this recommended by @Naturescapes_Rocco, and feel like the value is pretty hard to beat. I waited until it was on sale to purchase, but even at the $190 list price, it's great. Water source is an artesian spring (well). From the tap, TDS measures 56. In my 5g, I've used water straight from the tap, but opted for RO so I can keep things consistent with this setup. TDS after initial filter flushing was 0 (yeah, 0!).​
55 Gallon Brute Trash Can, 44 Gallon Brute Trash Can, 32 Gallon Greenmade Trash Can, and 2x dollys.
I need to improve this setup because it's a PITA. RO goes into the 55g, then I need to transfer it to the 44g to fill the tank. The 32g was originally what I purchased because that was the biggest Costco had, but it didn't hold enough water to fill the tank, so I had to rethink my plans. Seeing the 55g in person, I wasn't confident I could fit 2 side by side in the space I set up the RO in (which I couldn't). This setup is very clunky and requires a lot of water moving to make it to the tank. I've been using the 32g for waste water so I could water plants with it, but I might get worn down quickly and send it down the drain.​
Plants (all UNS TC)
  • Homalomena Sp Sekadau South (babysitter)
  • Hydrocotyle Tripartita (potentially babysitter)
  • Alternanthera Reineckii Rosanervig (initially planned as babysitter, but may keep some in long term)
  • Hemianthus Callitrichoides 'Cuba'
  • Rotala Rotundifolia Blood Red
  • Anubias Nana Petite
  • Micranthemum 'Monte Carlo'
  • Alternanthera Reineckii 'Mini'
  • Echinodorus Rose
Livestock:

Coming soon

  • 25x Red Neon Blue Eye Rainbow
  • 7x C005 Corydoras pantanalensis
  • 3x C123 Yellow Cory 'Rio Nanay'
  • Aphyosemion bivittatum 'Funge' Pair
  • 5x Stiphodon rutilaureus Goby
  • 1x True Siamese Algae Eaters
  • 1x Bamboo Shrimp
  • 8x Amano Shrimp
81 Replies · 4573 views
JayP
Supporting I Donated 2026 Rockstar
Last reply · posted in Equipment Discussions
There are several threads discussing the new Aquael Hypermax 4500BT. I'm sure many would like some reports on it's performance over time. We have a thread discussing nano canister filters. We're all waiting for one of @Naturescapes_Rocco in depth write-ups discussing his filtration set-up. @Pepere and @*Ci* have unique set-ups as well, @Kwyet has used a matten filter, and we have several other members running sumps. That doesn't even include all those running sponge and HOB filters.

The idea is that we can consolidate a lot of filter information in one place making it easier to find rather than searching through so many threads. Maybe this won't work but I thought it was worth giving it a try. Perhaps it may be better listed as an article at some point.

I'm going to get things started by discussing factors I feel are most important to me when choosing a filter.

1) Filtration Performance: This goes without saying. The filter’s primary job is to keep our water clean and free of anything that harms the inhabitants. Of course, there are multiple factors that play into this. Some say flow is most critical, while others claim media volume is most important. Are there other factors? I still have limited experience, but my view, having done considerable reading, is that flow tends to be a bit overblown. You’ll see recommendations of anywhere from 4 to 10 times turnover rate with most leaning toward the higher end of that. I don’t think turnover rate is really the detail to be concerned about, at least with heavily planted tanks like are the norm here. I think the focus should be simply on ensuring flow achieves the goal of effectively moving water through the system to remove toxins/waste, delivering nutrients, and aiding gas (oxygen/CO2) transfer. If a turnover rate of 3 or 4 does that without dead spots in the tank, you should be good. After all, most of us here are plant focused and therefore, the fish we generally have are smaller community species that typically don’t care for high flow (there are, of course, exceptions).

I think there’s a simpler answer regarding media volume; more is better. Obviously, there must be a balance between internal volume and overall size of the filter. Real estate in and around our aquarium stands is precious. Filters like the Fluval FX6 and the newest Aquael Hypermax are huge. If you’re going for one of those, you’re likely putting it on a large tank with plenty of space underneath but again, it’s a matter of finding the right balance that provides the performance you need in a manageable size.

2) Reliability/Durability: This is where solid reviews come in handy and why getting feedback from users here is invaluable. Filtration performance becomes moot if the filter isn’t running, or worse yet, just flooded your house. Being able to easily source spare parts is also valuable, which is why sticking to the top well-known brands is often a safe route. It’s also why many aquarists place canister filters in protective containers, something else to consider when taking into account, size of filter. (this is something I should really do as I’ve had to clean up a few significant spills after filter maintenance and not getting the top secured in place properly 😲 )

3) Tie – Maintenance/Noise Level: These two factors are equally important to me. If the filter is a pain to maintain, I’m going to put it off, and that’s bad. It affects the performance. But equally important to me is how noisy it is. I tend to be sensitive to annoying little sounds regardless of where I am; at home, in the car, at work, you name it. If the aquarium is in a part of the house I spend a lot of time in, well then, it’s even more important.
I don’t know if Oase was first to do it, but the idea of the prefilter was, I think, a game changer for many. I imagine it was derived from people installing foam filters on the intake pipes. Having an easily removable section with foam filters that catch a lot of large particles before entering the primary filter chamber is a great idea, resulting in expanded intervals between main filter head removals for cleaning.
Another aspect of maintenance is ease of priming. This could also be an aspect of performance but I don’t think it is quite as important. I’m not sure there is a canister filter that is truly or consistently easy to prime. Some may start out that way, but over time, become less and less so. This is an area I’d really like to see product designers put more serious thought. My experience so far is with Oase and the Fluval 07 series. Hated the Fuval priming and I’m just so-so with the Oase. Let me know your experience with priming other brands.

As for noise, I don’t mind the slight hum of an impeller as long as it’s steady and consistent, much the same way some people, including myself when I was younger, like the smooth steady sound of a fan at night to help them sleep. It’s when the sound becomes inconsistent, I’m bothered. I also don’t care for the sound of splashing/trickling water while I’m focused on other things. Only when I’m camping near the banks of a creek or other body of water is this OK 😊. This is one of the main reasons I’m not a fan of HOB filters. I’m also tweaking my CO2 reactor designs to minimize the bubble sounds of CO2 entering the reactor.

4) Cost: Let’s be clear, the cost doesn’t stop when you pay the retail price for the filter. There’s the cost of media and spare parts plus the cost of electricity. What’s the rated wattage of the filter. I see the Aquael filters claim to consume lower power and are therefore cheaper to run. What about special filter cartridges or foam. Is it easy to cut foam filters from inexpensive bulk material? How often are gasket replacements necessary, or are there common issues with parts failing over time. Of two Fluval 07 filters I’ve used, both needed replacement impeller shafts. Oase Biomaster filters seem to have an issue with the input/output head often needing replaced.
I admit cost isn’t a critical factor for me, but I know it is for many others, so this is another instance where finding the right balance is key, in this case, the balance between price and performance.

Share your thoughts. Do these factors seem to align with yours or do you think I’m way off base. Tell us what types and brands of filters you prefer and why.

125 Replies · 6935 views
F
· posted in Fertilizing and Aquarium Chemistry
Hi everyone,

I’ve recently been working on an application to help aquarists with water-chemistry calculations. I have just released the first version and written a short introductory article about it:

Every Aquarium Has Its Own Balance: Aquarium Water Calculator

Aquarists are often told that a healthy aquarium is all about balance. Far less is said about how to define that balance or achieve it in practice. The right targets depend on the water source, livestock, plants, CO₂, lighting and fertilization method. That question led me to create Aquarium Water Calculator - a tool that translates the general idea of “balanced water” into specific targets and a practical recipe.


02.webp


Custom remineralization instead of a one-size-fits-all mix

Many ready-made remineralization products provide a recommended dose and describe their general effect on GH, KH or conductivity, but the exact proportions of their individual ingredients are often unavailable. Users may not know how much calcium, magnesium, potassium, sodium, chloride or sulfate they are actually adding.

One fixed mixture cannot precisely meet the needs of every aquarium. Soft-water fish and shrimp have different requirements from livebearers, while a heavily planted, CO₂-injected aquarium may have different needs altogether.

Aquarium Water Calculator allows users to create custom recipes from readily available salts with declared compositions. Using the measured source-water values, water volume and either preset or custom targets, it calculates which components to use and how much of each to add for that particular aquarium.


04.webp


Balance without costly trial and error

Unsuitable remineralization or fertilization can contribute to poor plant growth, algae problems or inappropriate conditions for livestock. Finding a solution through trial and error can cost time and money and, in the worst cases, affect the health of the aquarium’s inhabitants.

Aquarium Water Calculator lets aquarists experiment with different options virtually before changing their water. Users can adjust target values, salts, fertilizers and doses and see how each change affects the overall water chemistry. Unsuitable combinations, excesses or missing components can be identified before products are purchased or a recipe is used.

Calculations are not a substitute for testing. Prepared water can be retested, and the recipe can then be refined according to the measured results. I recommend testing any new recipe on a separate batch of water first.

Which fertilizer is actually right for a particular aquarium?

Commercial fertilizers vary considerably in their composition and nutrient ratios. A product may add nutrients that are already present in sufficient amounts while failing to provide those that are deficient. Trying different fertilizers can therefore become unnecessarily expensive.

The program can compare available fertilizers and identify which product or combination best matches the selected targets. Users can choose products based on what their aquarium actually needs rather than relying only on a general description on the label.


05.webp


A practical way to learn about water chemistry

Water chemistry can be difficult to understand because changing one component may affect several parameters at once. The application therefore also serves as a hands-on educational tool. Users can see how salts, fertilizers and target values affect GH, KH, pH, TDS, CO₂, calcium, magnesium, potassium and plant nutrients. By experimenting without altering the aquarium itself, users can develop a practical understanding of the individual components and how they interact.

The application in brief

Aquarium Water Calculator is a commercial desktop application from Fish Tank Apps. I created the first version for my own use and later developed it further based on feedback from friends who tried it. Users enter their source-water test results and choose either preset or custom targets. The application then calculates a complete remineralization and fertilization recipe that can be adjusted after the prepared water is retested.

The program does not test water directly and is not a substitute for laboratory analysis or professional instruments. It is an informational and planning tool; users must verify the calculated values with their own tests and evaluate them in the context of their particular aquarium.

For more information: Link to the product page

Following a discussion with Art, the app has been added to the ScapeCrunch Useful Links Directory: Fish Tank Apps – Aquarium Water Calculator

I would also like to invite up to three ScapeCrunch members to test the application in detail. Each selected tester will receive a complimentary permanent license.

Ideally, I’m looking for members who would be willing to explore the application’s menus and features, test it using a real aquarium or water-preparation scenario, and share a detailed written review here with photos and screenshots showing the testing process and results. If someone would prefer to document the test in a YouTube video, that would also be very welcome.

The complimentary license would be provided for independent testing, not in exchange for a positive review. Honest feedback, whether positive, mixed or critical, would be equally valuable to me.

If you are interested, please send me a private message with a little information about your aquarium setup, water source, the water-testing kits and equipment you have available, whether you use CO₂, and which fertilizers you currently use or prefer.

Thank you for taking a look!
0 Replies · 28 views
BenB
Rockstar
Last reply · posted in Fertilizing and Aquarium Chemistry
I haven't been able to find this for sale in awhile. I found it on eBay, but I'm concerned about expiration. Luckily, I don't test as often lately, so the kit I have has lasted, but I'm about to the end. What is everyone's #2 preferred test kit or do you know a source for these?
6 Replies · 52 views
HardeeParty
Last reply · posted in Journals
I’ve had this idea in my head for a couple of years now and it’s finally taken shape. The inspiration came from a local conservation area/regional park. I wanted a tall nano scape with stone/wood hardscape with a pump/filter in the rear plumbed so the outflows exited at the top and trickled down the face of the scape. Primarily a moss scape dotted with some native accent plants.

Tank: 15cm x 15cm x 25cm ultra clea low iron nano tall with floating bottom.

Light: random plant light from local store.

Substrate: random top fin black pebble gravel that came in a bag with a marketplace tank setup.

Pump: random pump from my dad’s garage from one of my brothers super old tanks.

Plumbing: extra black RO 1/4” tubing and quick connect fittings from a reptile mist kit (for another project).

I started by building the frame with divider panels. There are two ledges that propped up the hardscape, and the whole frame was draped and buffered with 3d spacer mesh (Epiweb) to retain moisture and humidity near the top of the scape without needing a lid. The mesh also helps keep the wood in contact with water, and aids establishing moss.


IMG_3027.webp

IMG_4066.webp

IMG_8089.webp

IMG_4064.webp

3d spacer mesh:

IMG_3835.webp

Back filter installed:

IMG_7658.webp

And the dry fitment test. Had to file down the rock on both sides so it fit without being forced in there. I constructed it this way so the whole scape could be pulled out at once if I needed to reset it, or just the pump if it needed to be serviced. More 3d spacer mesh was wedged in all the crevices for additional wicking.

IMG_7650.webp

Topped up and testing:

IMG_7669.webp

Additional hardscape up top to help hide all the outflows, and provide space for the finishing flora (maybe some air plants and/or orchids).

IMG_7895.webp
3 Replies · 78 views
gnatster
Supporting I Donated 2026
· posted in Freshwater Fish Discussions
Chris Lukhaup recently posted a video on the Ruby Tetra. For some odd reason, I like these little devils so much that I've ordered another 1/2 dozen.

0 Replies · 33 views
Back
Top