Welcome to ScapeCrunch
We are ScapeCrunch, the place where planted aquarium hobbyists come to build relationships and support each other. When you're tired of doom scrolling, you've found your home here.
Social Feed
I often point out my love for double tap quick release valves. Chihiros currently has theirs on sale and since I was buying some other stuff I added a few to the cart. I thought they appeared to be smaller than the other brands I've used (UNS and Oase) based on the website images, and sure enough, they are. If you're in need, might be a good time to grab some. They also have the model that converts from 16/22 to 12/16. I made a big purchase so I had free shipping. Not sure if the price would still be great with shipping included.
Chihiros Double Tap Quick Connector

Chihiros Double Tap Quick Connector
3 replies
·
83 views

Hello Welcome, soundwave
Welcome to ScapeCrunch, @soundwave!
We would love to get to know you. Please tell us about yourself. What tank do you have?
We would love to get to know you. Please tell us about yourself. What tank do you have?
0 replies
·
6 views
replies
Legacy View
I apologize for my hiatus-- life has kept me busy as well as my other hobby projects. Some of you may have read my other journal on my Nature/Garden style hybrid, where I decided to switch pace from fast growing stems and rescape the tank to a traditional Nature style scape, which better suits my busy schedule.
I wanted to wait to post my initial pictures until I had gotten most of the plants in and arranged. Some plants were reused from the old scape and new ones were added. I'm still waiting on some Trident Fern, Blyxa, and Crypts to arrive, but those will be the final additions and then the scape will just be set to maintain and mature mode.
The hardware is still all the same, but for the purpose of starting a new thread I will reiterate the list of hardware.
Tank and Hardware:
Landen 100p
39" X 17.71" X 17.71" ~50 gal
Two Week Aqua T90 Pros
Oase Biosmart Thermo 600
GLA Dual Stage Regulator with inline diffuser
Fresh UNS controsoil, Black Fine
Beach Driftwood and Ancient Stone
Flora:
Eleochari Ascicularis'mini'
Staurogyne Repens
Elatine Triandra 'Fluorescence'
Bucephalanda sp 'Brownie Ghost 2011', 'King Devil', 'Neo 2015'
Anubias sp 'Nana Jade', 'Chili', 'Stardust Mini Coin'
Rhaphiadora Beccarii
Hygrophila Pinnatifida UK Variant
Java Fern 'Needle Leaf', 'Needle Leaf Mini', 'Orange Narrow'
Ranunculus Inundatus
Blyxa sp Japonica
Cryptocoryne Spiralis Tiger 'ADA Variant'
Nymphoides 'Taiwan'
Nymphaea Micrantha
Nymphaea 'Zenkeri'
Homonoia Riparia
Fauna:
15 Cenepa Red Pencilfish
15 Platinum Rummy Nose Tetras
2 Wild Type Honey Gourami
~25 Blood Orange Neocaridina
I'm basically running the same photoperiod as before, but added in a half hour ramp up and ramp down, so 1 hour ramp and 6 hours on, 45% Intensity on a custom color setting. Co2 injection rate was adjusted to account for slower growing plants, but still set to come on 2 hours before lights on. I'm dosing 5mL of APT 3 daily and 8mL of Seachem Advance to try and get my hairgrass carpet recovered.
I was a but worried about a mini cycle since I had to replace all of my substrate, thankfully due to the lower ammonia release of Controsoil, the bacteria were able to handle it with no issues. The plants don't have any algae, but since startup with the last scape, I'm still dealing with a lot of GDA and hair algae buildup on the glass by the end of the week. I'm assuming it's due to the spread of the pendant lighting, so I'm not sure what to do about that other than to just wait until after WC day to take tank photos
Maintenance has been far more straightforward as the tank works towards balancing. The first few water changes were time consuming as I move plants around and try to solidify an appeasing layout, however I think I have now finalized my planting groups and am happy with things. Now I will wait for some Trident Fern mats to add behind the driftwood, Blyxa Auberti variant from Joe, and a Cryptocoryne Albida 'Costata to fill out the background, and then let things fill out.
Now for the fun part! Photos. I won't be taking many until the plants start to recover and fill in, but I did take a few of the more uncommon plants I have in here as I find those to be interesting to document.
Tank shot:
Java Fern 'Orange Narrow', which I've spent an incredibly long time trying to find and was finally able to track down 4 rhizomes, 3 of which are in here on nutripads and one in my farm tank as a backup. Some leaves are already getting some nice orange coloring on the tips, I'm very excited about this one and can't wait to see what it will do.

One of my Brownie Ghost 2011 clumps I've been farming, which I decided to use as a midground plant for some contrast:

Nymphaea Zenkeri, super common but showing such pretty colors under these lights that I couldn't resist:

Homonia Riparia, stuffed into the crevices of the driftwood. Waiting for it to gain some red and orange tones, but won't happen until my aquasoil finishes leeching, as this plant only develops very vibrant red coloring when under nitrate limitation:

Nymphaea Micrantha, a lily that I have not yet kept before but am really enjoying. The multicoloring speckles on the leaves are really beautiful and tie all or the other colors of the tank together on one leaf:

Let me know what you all think! I'd especially love to hear from those who were following the other scape.
I wanted to wait to post my initial pictures until I had gotten most of the plants in and arranged. Some plants were reused from the old scape and new ones were added. I'm still waiting on some Trident Fern, Blyxa, and Crypts to arrive, but those will be the final additions and then the scape will just be set to maintain and mature mode.
The hardware is still all the same, but for the purpose of starting a new thread I will reiterate the list of hardware.
Tank and Hardware:
Landen 100p
39" X 17.71" X 17.71" ~50 gal
Two Week Aqua T90 Pros
Oase Biosmart Thermo 600
GLA Dual Stage Regulator with inline diffuser
Fresh UNS controsoil, Black Fine
Beach Driftwood and Ancient Stone
Flora:
Eleochari Ascicularis'mini'
Staurogyne Repens
Elatine Triandra 'Fluorescence'
Bucephalanda sp 'Brownie Ghost 2011', 'King Devil', 'Neo 2015'
Anubias sp 'Nana Jade', 'Chili', 'Stardust Mini Coin'
Rhaphiadora Beccarii
Hygrophila Pinnatifida UK Variant
Java Fern 'Needle Leaf', 'Needle Leaf Mini', 'Orange Narrow'
Ranunculus Inundatus
Blyxa sp Japonica
Cryptocoryne Spiralis Tiger 'ADA Variant'
Nymphoides 'Taiwan'
Nymphaea Micrantha
Nymphaea 'Zenkeri'
Homonoia Riparia
Fauna:
15 Cenepa Red Pencilfish
15 Platinum Rummy Nose Tetras
2 Wild Type Honey Gourami
~25 Blood Orange Neocaridina
I'm basically running the same photoperiod as before, but added in a half hour ramp up and ramp down, so 1 hour ramp and 6 hours on, 45% Intensity on a custom color setting. Co2 injection rate was adjusted to account for slower growing plants, but still set to come on 2 hours before lights on. I'm dosing 5mL of APT 3 daily and 8mL of Seachem Advance to try and get my hairgrass carpet recovered.
I was a but worried about a mini cycle since I had to replace all of my substrate, thankfully due to the lower ammonia release of Controsoil, the bacteria were able to handle it with no issues. The plants don't have any algae, but since startup with the last scape, I'm still dealing with a lot of GDA and hair algae buildup on the glass by the end of the week. I'm assuming it's due to the spread of the pendant lighting, so I'm not sure what to do about that other than to just wait until after WC day to take tank photos
Maintenance has been far more straightforward as the tank works towards balancing. The first few water changes were time consuming as I move plants around and try to solidify an appeasing layout, however I think I have now finalized my planting groups and am happy with things. Now I will wait for some Trident Fern mats to add behind the driftwood, Blyxa Auberti variant from Joe, and a Cryptocoryne Albida 'Costata to fill out the background, and then let things fill out.
Now for the fun part! Photos. I won't be taking many until the plants start to recover and fill in, but I did take a few of the more uncommon plants I have in here as I find those to be interesting to document.
Tank shot:
Java Fern 'Orange Narrow', which I've spent an incredibly long time trying to find and was finally able to track down 4 rhizomes, 3 of which are in here on nutripads and one in my farm tank as a backup. Some leaves are already getting some nice orange coloring on the tips, I'm very excited about this one and can't wait to see what it will do.
One of my Brownie Ghost 2011 clumps I've been farming, which I decided to use as a midground plant for some contrast:
Nymphaea Zenkeri, super common but showing such pretty colors under these lights that I couldn't resist:
Homonia Riparia, stuffed into the crevices of the driftwood. Waiting for it to gain some red and orange tones, but won't happen until my aquasoil finishes leeching, as this plant only develops very vibrant red coloring when under nitrate limitation:
Nymphaea Micrantha, a lily that I have not yet kept before but am really enjoying. The multicoloring speckles on the leaves are really beautiful and tie all or the other colors of the tank together on one leaf:
Let me know what you all think! I'd especially love to hear from those who were following the other scape.
10 replies
·
527 views


With all the updates on getting heaters, curious on a no-heater set up.
i keep our home at < 75 in summer and > 68 in Winter. My aquarium water temp seems to correlate well with the room temp. A temp range of 68 - 75 seems ok for CPDs and potentially for neocardinas.
Do people in climates similar to the us midwest, have experience with not having a heater ? what is the downside ?
12 replies
·
140 views
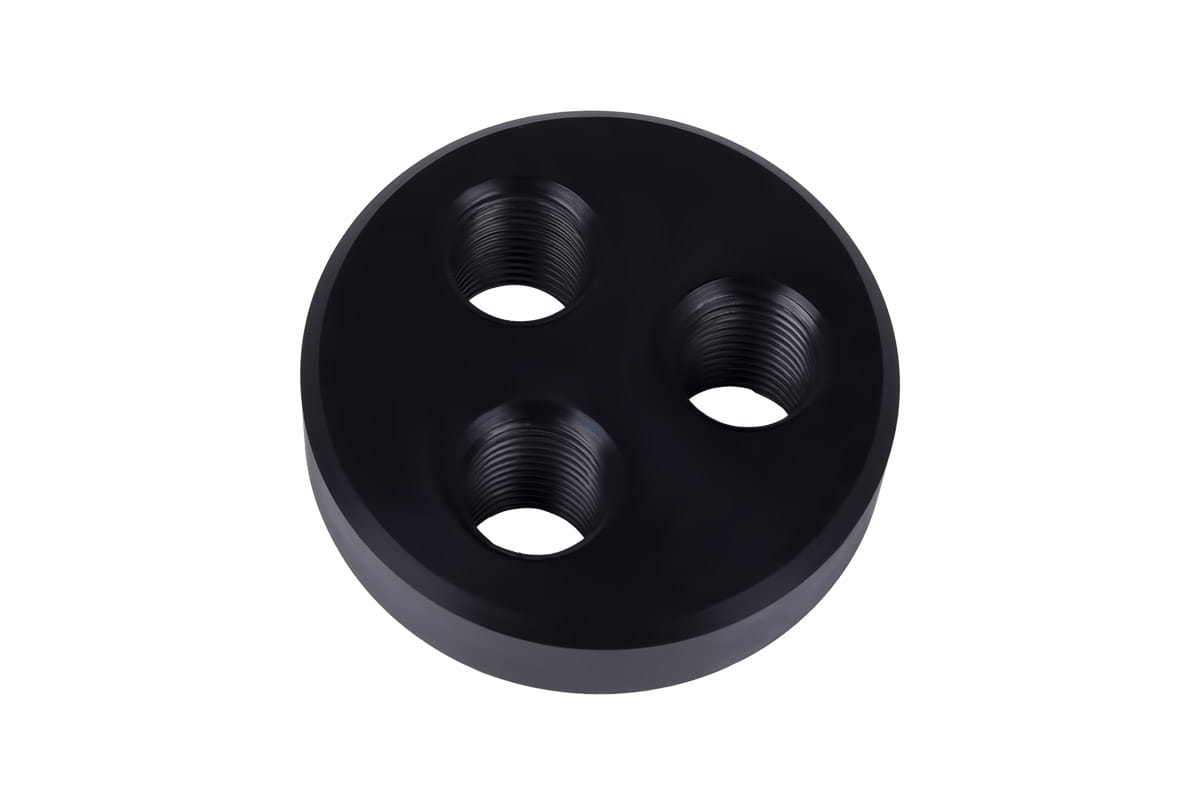
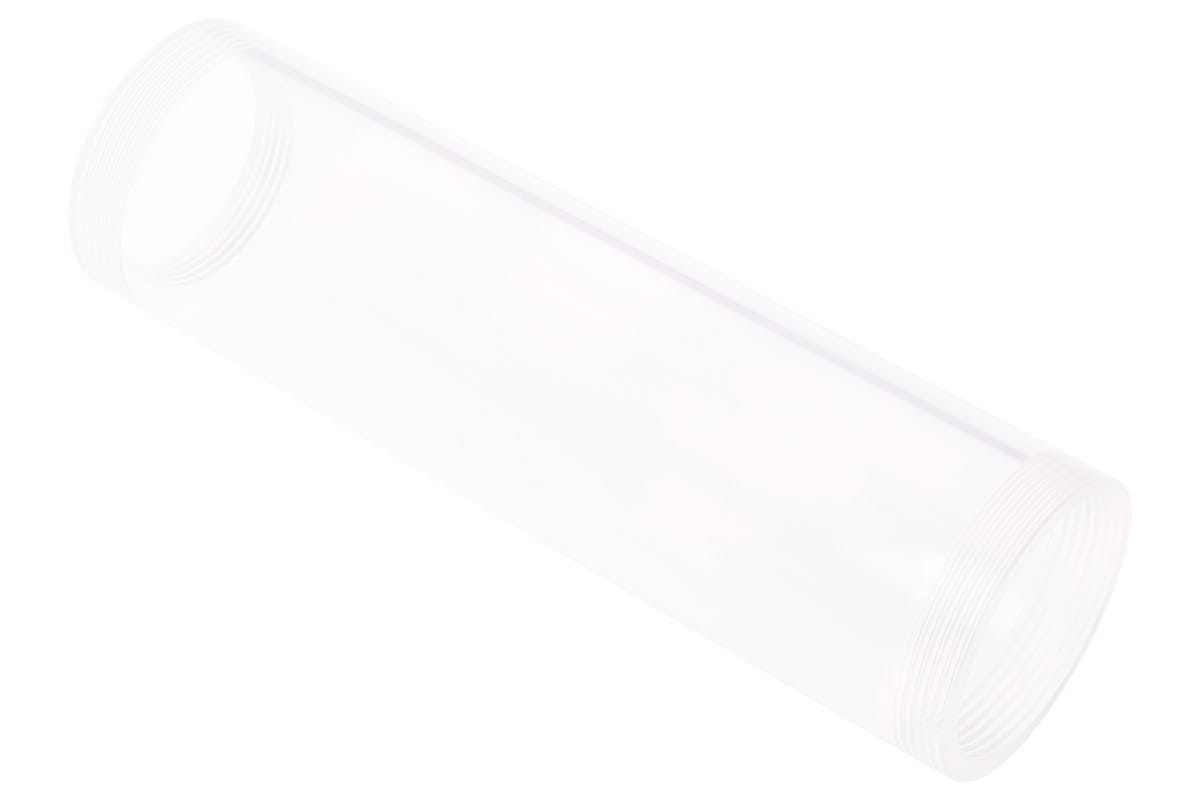
Hi all, first post. Thought it'd be fine to start a new thread specifically about yugang reactors for smaller tanks, under surface area 3000cm^2 (for the most part). Guess this could be a journal to some degree, but I think this thread is more for info than sharing my tank. I know people are generally using pvc pipes and fittings to DIY their reactors and to keep the cost down. I wanted something that looked super nice and was already "prebuilt". After scouring the internet for the longest time, I found that these PC water cooling reservoirs should serve that purpose.

Maybe someone's tested this already and found out that it doesn't work, but I wanted to put this out there since I haven't seen anything on it. I don't want to gatekeep this and I hope that this gives people another option since not everyone may have tools readily available. Since this is considered a PC component, there are a number of options available for fittings that I'll get into in a bit that make this great.
There are a few downsides though:
1. Limited diameters. I've only seen options for 50 or 60mm diameters. The 50mm ones have 40mm inner diameter, and 60mm ones I assume have 50mm inner.
2. Limited lengths. I've seen them as small as 6cm long all the way to 40cm long. The caps/lids range from 6-10mm thick.
Largest I've seen is 50mm and 400mm long. Useable diameter and length, let's say are 40mm and 380mm respectively. If you want a pH drop of 1.5, largest your surface area can be is 2690cm^2. Obviously you can stretch this if you don't need that large of a pH drop.


3. Standardized G 1/4" thread. This isn't as common a fitting (in the US at least). This thread size can be good or bad.
4. Some others mentioned later.
As for the upsides:
1. Clean look, no DIY necessary, no PVC glue, certain listings come with brackets and screws.
2. Inexpensive, I got a 210mm variant for ~$15USD
3. Outlet is offset to the side. You can rotate as necessary to control in overflow mode.
4. Others mentioned later.
Again, this is for PC water cooling. 95% of the parts I've seen are made of brass. They are however either chrome or nickel plated.
As of right now, I have my ADA 60P freshly cycling on a dark start. I was able to test the co2 functionality (not measure co2 levels). I am able to get a co2 bubble to develop inside and work with overflow. My "reactor" is 210mm long and has 50mm diameter. Calculating with the inner diameter (40mm on mine) and the useable length (190mm if you take away cap length), I should theoretically be able to get a ~1.4ph drop.
The filter I'm using is the Biomaster 350 thermo. Tubing is 5/8" for this, and this is one of the downsides I want to get into. This is for PC cooling like I mentioned and they generally don't use tubing that large. If you're running a filter that uses 12/16mm tubing instead of 5/8" (16/22mm) then you might have a much easier time finding fittings to work. G 1/4" thread is roughly a 1/2" opening. I'm not actually getting less flow with this because I realized the 16/22 quick tap valves I use actually have a 1/2" opening on the inside as well. This G 1/4" thread shouldn't be an issue then. FYI, G 1/4" is the same as 1/4" BSPP. (british standard pipe parallel)

I tried making my setup as NEATLY and good looking as possible. Above is my final work (as of now). I have some tube trimming to do though to make it nicer. Another thing I want to mention, the first time I tried this, I connected my outlet straight to the yugang reactor. I saw this thread reply (below) saying that their 2" pvc (~50mm) had no issue with the flow speed after adjusting their tap valve. That was not true in my experience. My reactor should be about the same size as this one, but the water rushes through very turbently:

It slowed the flow so much that almost all water was going through bypass even though valve was fully open. (Don't get cheap Y or T splitters either...)
Here's a video of the flow WITHOUT a bypass. Video starts with tap valve already slightly shut 25% of the way and slowly getting shut more as you can see:
View attachment IMG_7536.mov
It doesn't matter where you put the valve but I think it makes more sense to put it on the reactor side. You can control how slow the flow is that way. Ff you place it on bypass side, you can never slow down water through reactor that way - only more going to it.
You might ask, where's the co2 supposed to go if you don't have the inline accessory that I have? Well there's a threaded acrylic pipe that comes with this reactor if you look at listings. All you need to do is get a 4/6mm push connect to g1/4" male thread fitting for a few bucks and your issue is solved. The threaded acrylic pipe can also be screwed off and there are more extender fittings and such to replace that if you search them online. Options like the 60mm length reservoir I posted above may only have 2 outlets, but the larger 400mm example I gave has 4 holes with different hole positions too. You can place a purge valve that slightly works (there's literally a fitting for that too). The main outlet hole is still offset as well. (another example shown below) Any hole you don't want to use? Just buy a g1/4 plug. The benefit of using this PC cooling reservoir is the amount of fittings they have that can work for your needs.

For my setup, I ended up using a $3 dollar plastic garden hose splitter that has 3/4" GHT (garden hose thread) that was two valves on it (best of both worlds). I also bought the appropriate barbs to fit into it (so hosing can attach). Because I wanted to put this is my AquaForestAquarium Archaea cabinet, everything is packed really tight. Would be nicer if tubing had more room to move and didn't kink as easily. Just a tradeoff so you see I had to use elbow barbs and keep some tubing real short.
My fittings right now are brass but I found one seller on ebay (shipped from China) that has G 1/4" male thread to 5/8" barb in STAINLESS STEEL. However, it is BSPT (british standard pipe thread) so this one tapers inwards and will probably need teflon/very tight twist to seal with the o-ring. BSPT fitting can go into a BSPP threaded hole, but BSPP cannot go into BSPT. Someone correct me if I'm wrong about that, but I'm fairly certain that is the case.
If you've read to this point, I think this should be enough to understand what you can do with this PC cooling reservoir. It has limitations size wise and a need for a bypass if you don't want to slow the flow on your tank too much (depending on your filter), but it really is a nice cheap option that we can use for our hobby.
Please correct or question me anywhere!!!
--------------------------------------------
Just links to what I bought for anyone curious. I hope links are allowed. I don't have any commission to these. Just purely for info on what I have.
You can buy these for cheaper on AliExpress. I just didn't want to wait and paid a little more for the items. They're from the same supplier, but I also recommend finding a higher quality brand. The one I have is 50mm outer diameter. I think companies like Freezemod have higher quality ones, and they might be 60mm. Do your own research on this, I didn't do enough on this side.

Some other hard to find accessories:
- If you're trying to replace inlet cap, make sure the cap you find works. Here's one I found for 50mm diameter:
 shop.alphacool.com
- I believe the acrylic reservoir itself is this (please check yourself!!):
shop.alphacool.com
- I believe the acrylic reservoir itself is this (please check yourself!!):
 shop.alphacool.com
- This one is super nice, it's a rotatable cap replacement you can get. Set your in/outlets exactly where you want. I'm not sure if 50 or 60mm diameter though:
shop.alphacool.com
- This one is super nice, it's a rotatable cap replacement you can get. Set your in/outlets exactly where you want. I'm not sure if 50 or 60mm diameter though:
I also mentioned not wanting to have to drill anything. You might wonder how to attach those brackets without doing so. I bought adhesive stickers with screw ports from AliExpress, and used screws/washers that came with the reservoir:

Can probably get on Amazon as well. The adhesive first, then stack 3 washers next, bracket next, thread the screw through the bracket hole -> washers -> adhesive screw port.

-------------------------------
Random thought:
I found this one singular option that I've not tested. It looks so similar to the internal bypass option that yugang himself devised. (a prebuilt option at least) It's slotted but to be honest, I don't know if it would work well. If you search for aluminum pc water cooling reservoir, you will find this. Only comes in one size unfortunately. Again, I have NOT tested this.


Maybe someone's tested this already and found out that it doesn't work, but I wanted to put this out there since I haven't seen anything on it. I don't want to gatekeep this and I hope that this gives people another option since not everyone may have tools readily available. Since this is considered a PC component, there are a number of options available for fittings that I'll get into in a bit that make this great.
There are a few downsides though:
1. Limited diameters. I've only seen options for 50 or 60mm diameters. The 50mm ones have 40mm inner diameter, and 60mm ones I assume have 50mm inner.
2. Limited lengths. I've seen them as small as 6cm long all the way to 40cm long. The caps/lids range from 6-10mm thick.
Largest I've seen is 50mm and 400mm long. Useable diameter and length, let's say are 40mm and 380mm respectively. If you want a pH drop of 1.5, largest your surface area can be is 2690cm^2. Obviously you can stretch this if you don't need that large of a pH drop.
3. Standardized G 1/4" thread. This isn't as common a fitting (in the US at least). This thread size can be good or bad.
4. Some others mentioned later.
As for the upsides:
1. Clean look, no DIY necessary, no PVC glue, certain listings come with brackets and screws.
2. Inexpensive, I got a 210mm variant for ~$15USD
3. Outlet is offset to the side. You can rotate as necessary to control in overflow mode.
4. Others mentioned later.
Again, this is for PC water cooling. 95% of the parts I've seen are made of brass. They are however either chrome or nickel plated.
Not sure if this will be an issue since brass is ~60% copper. Hamfist's tank is also huge compared to my 60p and it may be dependent on water changes. Having the plating on the fittings will lower the corrosion rate since we are in acidic lower pH water. I honestly don't think this should be a problem at all. There are acrylic and stainless steel options out there if you look for them. I've heard nickel plating is best.
As of right now, I have my ADA 60P freshly cycling on a dark start. I was able to test the co2 functionality (not measure co2 levels). I am able to get a co2 bubble to develop inside and work with overflow. My "reactor" is 210mm long and has 50mm diameter. Calculating with the inner diameter (40mm on mine) and the useable length (190mm if you take away cap length), I should theoretically be able to get a ~1.4ph drop.
The filter I'm using is the Biomaster 350 thermo. Tubing is 5/8" for this, and this is one of the downsides I want to get into. This is for PC cooling like I mentioned and they generally don't use tubing that large. If you're running a filter that uses 12/16mm tubing instead of 5/8" (16/22mm) then you might have a much easier time finding fittings to work. G 1/4" thread is roughly a 1/2" opening. I'm not actually getting less flow with this because I realized the 16/22 quick tap valves I use actually have a 1/2" opening on the inside as well. This G 1/4" thread shouldn't be an issue then. FYI, G 1/4" is the same as 1/4" BSPP. (british standard pipe parallel)
I tried making my setup as NEATLY and good looking as possible. Above is my final work (as of now). I have some tube trimming to do though to make it nicer. Another thing I want to mention, the first time I tried this, I connected my outlet straight to the yugang reactor. I saw this thread reply (below) saying that their 2" pvc (~50mm) had no issue with the flow speed after adjusting their tap valve. That was not true in my experience. My reactor should be about the same size as this one, but the water rushes through very turbently:
And so I had to resort to making a simple bypass. One lesson I learned, don't get a cheap valve on amazon for $5. I placed the valve on the bypass initially:
It slowed the flow so much that almost all water was going through bypass even though valve was fully open. (Don't get cheap Y or T splitters either...)
Here's a video of the flow WITHOUT a bypass. Video starts with tap valve already slightly shut 25% of the way and slowly getting shut more as you can see:
View attachment IMG_7536.mov
It doesn't matter where you put the valve but I think it makes more sense to put it on the reactor side. You can control how slow the flow is that way. Ff you place it on bypass side, you can never slow down water through reactor that way - only more going to it.
You might ask, where's the co2 supposed to go if you don't have the inline accessory that I have? Well there's a threaded acrylic pipe that comes with this reactor if you look at listings. All you need to do is get a 4/6mm push connect to g1/4" male thread fitting for a few bucks and your issue is solved. The threaded acrylic pipe can also be screwed off and there are more extender fittings and such to replace that if you search them online. Options like the 60mm length reservoir I posted above may only have 2 outlets, but the larger 400mm example I gave has 4 holes with different hole positions too. You can place a purge valve that slightly works (there's literally a fitting for that too). The main outlet hole is still offset as well. (another example shown below) Any hole you don't want to use? Just buy a g1/4 plug. The benefit of using this PC cooling reservoir is the amount of fittings they have that can work for your needs.
For my setup, I ended up using a $3 dollar plastic garden hose splitter that has 3/4" GHT (garden hose thread) that was two valves on it (best of both worlds). I also bought the appropriate barbs to fit into it (so hosing can attach). Because I wanted to put this is my AquaForestAquarium Archaea cabinet, everything is packed really tight. Would be nicer if tubing had more room to move and didn't kink as easily. Just a tradeoff so you see I had to use elbow barbs and keep some tubing real short.
My fittings right now are brass but I found one seller on ebay (shipped from China) that has G 1/4" male thread to 5/8" barb in STAINLESS STEEL. However, it is BSPT (british standard pipe thread) so this one tapers inwards and will probably need teflon/very tight twist to seal with the o-ring. BSPT fitting can go into a BSPP threaded hole, but BSPP cannot go into BSPT. Someone correct me if I'm wrong about that, but I'm fairly certain that is the case.
If you've read to this point, I think this should be enough to understand what you can do with this PC cooling reservoir. It has limitations size wise and a need for a bypass if you don't want to slow the flow on your tank too much (depending on your filter), but it really is a nice cheap option that we can use for our hobby.
Please correct or question me anywhere!!!
--------------------------------------------
Just links to what I bought for anyone curious. I hope links are allowed. I don't have any commission to these. Just purely for info on what I have.
Amazon.com: uxcell G1/4 Inner Hex Head Pipe Fitting Plug, Universal 304 Stainless Steel Thread Socket Plug with Green O-Ring for Terminate Pipe Ends or Replacement Drains : Industrial & Scientific
Amazon.com: uxcell G1/4 Inner Hex Head Pipe Fitting Plug, Universal 304 Stainless Steel Thread Socket Plug with Green O-Ring for Terminate Pipe Ends or Replacement Drains : Industrial & Scientific
a.co
You can buy these for cheaper on AliExpress. I just didn't want to wait and paid a little more for the items. They're from the same supplier, but I also recommend finding a higher quality brand. The one I have is 50mm outer diameter. I think companies like Freezemod have higher quality ones, and they might be 60mm. Do your own research on this, I didn't do enough on this side.
Some other hard to find accessories:
- If you're trying to replace inlet cap, make sure the cap you find works. Here's one I found for 50mm diameter:
AGZ Alphacool Cape Coolplex Base POM 3 Bar EOL
Alphacool accessories and spare parts! The original accessories for your water cooling directly from the manufacturer!
AGZ Alphacool Ice Cream Cup Acrylic Tube 60x205mm
Alphacool accessories and spare parts! The original accessories for your water cooling directly from the manufacturer!
I also mentioned not wanting to have to drill anything. You might wonder how to attach those brackets without doing so. I bought adhesive stickers with screw ports from AliExpress, and used screws/washers that came with the reservoir:
Can probably get on Amazon as well. The adhesive first, then stack 3 washers next, bracket next, thread the screw through the bracket hole -> washers -> adhesive screw port.
-------------------------------
Random thought:
I found this one singular option that I've not tested. It looks so similar to the internal bypass option that yugang himself devised. (a prebuilt option at least) It's slotted but to be honest, I don't know if it would work well. If you search for aluminum pc water cooling reservoir, you will find this. Only comes in one size unfortunately. Again, I have NOT tested this.


7 replies
·
480 views


I’m doing maintenance and unlocked the hoses with no issue. Tried re inserting and it’s now stuck like this. I can’t negotiate it any further or pull up on it. I’ve been hitting it with a hammer to no avail. What do I do? It’s neither fully closed nor open.
View attachment IMG_0159.mov
View attachment IMG_0159.mov
2 replies
·
38 views
Journal High-Tech 90P Build
Hi guys!
I'm new here, but not entirely new to planted tanks though I've been out of the hobby for the better part of the last decade between kids and moving a couple of times - but finally in a spot where I can do something again. I'm mostly going to be making things up as I go along, but plan on a lot of automation (I want to integrate everything into home assistant) and a lot of DIY as I love the challenge of building things out myself.
The starting point:
I picked up a 90P rimless, low-iron tank on a great deal.
.webp")
I have a rough idea in my head for a stand to be built from plywood - just have a couple other house projects to finish off before starting that built.
Wife says I can only have one aquarium, so for this tank, I want to go all out with a sump to allow for auto top off, and auto water changes, auto fertilizer dosing etc. etc. I have half a plan in my mind.
I've also started on the light fixture which I've modeled up in CAD, and plan on making out of an 8020 extrusion, and some 3D printed bits.

I'm using bridgelux gen 3 thrive CW (3000k) and WW (5000k) LED strips which have super high CRI at 98+ along with some specific XPE2 wavelengths that I'll solder onto some starboards. Far Red (730nm), Red (654nm), Cyan (495nm), Blue (455nm), Visible UV (415nm). Each segment of the white channels will be on its own driver so I can adjust left to right brightness in thirds, and each colour channel on its own driver so I can vary each channel on a time-based approach.
These will be run from a custom PCB board with Meanwell N-LDD drivers, and will run ESPHome on an ESP32 so it can link up with my Home Assistant installation.

That's it for now, this will probably be a very slow build so be warned if you follow along!
I'm new here, but not entirely new to planted tanks though I've been out of the hobby for the better part of the last decade between kids and moving a couple of times - but finally in a spot where I can do something again. I'm mostly going to be making things up as I go along, but plan on a lot of automation (I want to integrate everything into home assistant) and a lot of DIY as I love the challenge of building things out myself.
The starting point:
I picked up a 90P rimless, low-iron tank on a great deal.
I have a rough idea in my head for a stand to be built from plywood - just have a couple other house projects to finish off before starting that built.
Wife says I can only have one aquarium, so for this tank, I want to go all out with a sump to allow for auto top off, and auto water changes, auto fertilizer dosing etc. etc. I have half a plan in my mind.
I've also started on the light fixture which I've modeled up in CAD, and plan on making out of an 8020 extrusion, and some 3D printed bits.
I'm using bridgelux gen 3 thrive CW (3000k) and WW (5000k) LED strips which have super high CRI at 98+ along with some specific XPE2 wavelengths that I'll solder onto some starboards. Far Red (730nm), Red (654nm), Cyan (495nm), Blue (455nm), Visible UV (415nm). Each segment of the white channels will be on its own driver so I can adjust left to right brightness in thirds, and each colour channel on its own driver so I can vary each channel on a time-based approach.
These will be run from a custom PCB board with Meanwell N-LDD drivers, and will run ESPHome on an ESP32 so it can link up with my Home Assistant installation.
That's it for now, this will probably be a very slow build so be warned if you follow along!
7 replies
·
145 views
Journal 22 gallon long bookshelf
Time to start a new thread.
I’ll fill in some details later, but I’m working on the hardscape now. Any and all criticism is appreciated. The vision is nothing more, and nothing less, than something appealing to the eye.
90cm x 30cm x 30cm Lifegard Aquatics ultra clear bookshelf tank. Buce and anubias on the hardscape, stems towards the back and center, mid to front carpet with some changes in shade and texture down to a flat grade on the right side of the tank.
Lily pipe inlet and skimmer will be in the back left corner with the outflow in the front left to hopefully achieve circular flow. I’ll be running an in-line diffuser. Light will be the P600 Pro that I regrettably did not upside to 900. Oh well. I’ll mount it high and hopefully it’ll have enough spread.
I have some dragon stone and red lava rock rubble I’ll use at the base to blend into the substrate, as well as some stratum I may or may not cap with.
218 replies
·
23590 views
Journal 75P - Journey Into High Tech
Inspiration, Goals, & Considerations
I've had an interest in aquariums since a young age and had my own aquarium with fish like Angelfish and Mollies around middle school. Growing up, my dad had a bigger tank with Blood Parrots and Silver Dollars. Over 10 years ago, I had a low maintenance 55 gallon planted tank. I was pretty proud of it, but always envied the high tech tanks I saw on forums/social media and told myself when I broke that tank down that the next time I set up a tank, it would be like what I envied. At the end of 2024, I set up a small low tech 5 gallon planted tank to help scratch my aquarium itch, which really only reaccelerated my desire for setting up a high tech tank. And now, here we are!
The size of the tank was mostly dictated by the space. I originally planned on something around 30 gallons, but my LFS had the UNS 75P in stock and after measuring and discussing with my wife, we agreed it would work for the space. The tank is between the kitchen and living room, which is essentially a play area for my son, so lighting needs to be adjusted to make sure he's not blinded by the light when looking up at the tank.
Generally, I'd like to have a visually pleasing aquarium with lots of fish and plants that's peaceful to enjoy. I'd like to automate / reduce as much friction as possible and I realize there's still plenty I need to learn, so I'll need to have patience when things go wrong. I want to keep away from anything that's hard to get out of the tank once it's in (duckweed, moss, pest snails, etc). I felt like sharing prices below might give value to anyone in the future that's looking to start where I did with a high tech tank.
Specs (prices include sales tax)
Tank:
Lighting:
Filtration:
Co2:
Inflow & Outflow Pipes:
Substrate & Hardscape:
Fertilization:
Other Misc Equipment:
Chihiros CO2 Drop Checker
5 x Oase ShutOff Valve 16/22
Inkbird WiFi ITC-308 - $38
SwitchBot Leak Detectors - $15 each
"Stand"
Because the guts are located in a kitchen cabinet, I didn't want to screw directly into it and damage it. I was also concerned silicone would not be able to dry and outgas properly when sealing the edges. I opted to line the cabinet with contact paper. It's essentially a giant sticker, so I lined the sides, bottoms, and a second layer over the bottom edges/joints. I built a 3 panel "stand" inside of the cabinet so I could house everything and screw into the plywood without any concerns. I used 1 sheet of 3/4" Maple plywood and coated 1 side with a latex primer followed by a layer of latex white paint. This is mostly for water resistance and not necessarily water proof. I placed a silicone cabinet liner under the right side equipment. I made a shelf to place the EcoFlow on so if there's a catastrophic leak it's off the bottom.
One consideration I hadn't thought about was how "cramped" the cabinet would be since I placed the EcoFlow on a shelf with a "wall", which essentially made the work area much tighter.
Cable Management: Raceway and cable clips
Water
Express Water RO5DX - $160
Coming soon
I've had an interest in aquariums since a young age and had my own aquarium with fish like Angelfish and Mollies around middle school. Growing up, my dad had a bigger tank with Blood Parrots and Silver Dollars. Over 10 years ago, I had a low maintenance 55 gallon planted tank. I was pretty proud of it, but always envied the high tech tanks I saw on forums/social media and told myself when I broke that tank down that the next time I set up a tank, it would be like what I envied. At the end of 2024, I set up a small low tech 5 gallon planted tank to help scratch my aquarium itch, which really only reaccelerated my desire for setting up a high tech tank. And now, here we are!
The size of the tank was mostly dictated by the space. I originally planned on something around 30 gallons, but my LFS had the UNS 75P in stock and after measuring and discussing with my wife, we agreed it would work for the space. The tank is between the kitchen and living room, which is essentially a play area for my son, so lighting needs to be adjusted to make sure he's not blinded by the light when looking up at the tank.
Generally, I'd like to have a visually pleasing aquarium with lots of fish and plants that's peaceful to enjoy. I'd like to automate / reduce as much friction as possible and I realize there's still plenty I need to learn, so I'll need to have patience when things go wrong. I want to keep away from anything that's hard to get out of the tank once it's in (duckweed, moss, pest snails, etc). I felt like sharing prices below might give value to anyone in the future that's looking to start where I did with a high tech tank.
Specs (prices include sales tax)
Tank:
UNS 75P (8mm Glass - 29.52" x 17.71" x 17.71") - $519
UNS Atmos Backlight - $274
Lid - Working on getting a custom lid made
Lighting:
Chihiros WRGB II Pro 60 - $263
Chihiros WRGB II Pro Shades- $40
3D Printed Side Shades - Still need to do this
Chihiros Hanging Rope Kit- $37
Chihiros LED Lights Hanging Stand Kit - $64
Chihiros WRGB II Pro Shades- $40
3D Printed Side Shades - Still need to do this
Chihiros Hanging Rope Kit- $37
The mounting screws provided protruded beyond the bracket and would not fit with the backlight. I ended up getting washers and placing them outside the bracket to limit the screw depth.
Really disliked the fact that the stand was branded with Chihiros and visible when looking into the aquarium.
UNS Light Hanging Bar - $105
Filtration:
Oase BioMaster 2 Thermo 850 - $461
Oase tubing - Included with filter
Co2:
Misc. 10lb Cylinder - $118 (includes CO2)
CO2 Art PRO-SE Regulator - $105
Aqua Rocks Colorado Small Yugang Reactor 19mm w/ 90 degree elbows - $150
Inflow & Outflow Pipes:
Aqua Rocks Colorado Stainless Steel Lily Pipes 17mm - $54
Aqua Rocks Colorado Lily Pipe Clipper - $11
Substrate & Hardscape:
UNS Controsoil - Black, 'normal' used as a base and ‘fine’ on top - ~$129
CaribSea Super Naturals- Jungle River Sand (foreground sand) - $42 (only used a small mount of the bag - will user remainder in upcoming tank)
UNS Controsand Santa Fe (used as accent around dragon stone) - $57 (only used a small mount of the bag - will user remainder in upcoming tank)
UNS Controsand Sequoia (used as accent around dragon stone) - $52 (only used a small mount of the bag - will user remainder in upcoming tank)
I was surprised how dirty these rocks were and how much rinsing was required. For the price point, I felt like they should have come pre-washed.
Driftwood & Dragon Stone from Aquarium Co-Op - $111
Fertilization:
Burr Aqua Micros and Macros
Chihiros Magnetic Stirrers - $100
Battery Backup & PowerEcoFlow DELTA 3 Max (2kwh) - $680
Unfortunately prolonged power outages are not uncommon for us. We've been without power for multiple consecutive days, 7 days being the longest. This battery backup gives me some peace of mind knowing the tank can run for some time uninterrupted giving me the flexibility to get the generator out and running at a later time, refill with gas, etc. I believe run time will be around 12 hours.
Other Misc Equipment:
Chihiros CO2 Drop Checker
5 x Oase ShutOff Valve 16/22
Inkbird WiFi ITC-308 - $38
SwitchBot Leak Detectors - $15 each
"Stand"
Because the guts are located in a kitchen cabinet, I didn't want to screw directly into it and damage it. I was also concerned silicone would not be able to dry and outgas properly when sealing the edges. I opted to line the cabinet with contact paper. It's essentially a giant sticker, so I lined the sides, bottoms, and a second layer over the bottom edges/joints. I built a 3 panel "stand" inside of the cabinet so I could house everything and screw into the plywood without any concerns. I used 1 sheet of 3/4" Maple plywood and coated 1 side with a latex primer followed by a layer of latex white paint. This is mostly for water resistance and not necessarily water proof. I placed a silicone cabinet liner under the right side equipment. I made a shelf to place the EcoFlow on so if there's a catastrophic leak it's off the bottom.
One consideration I hadn't thought about was how "cramped" the cabinet would be since I placed the EcoFlow on a shelf with a "wall", which essentially made the work area much tighter.
Cable Management: Raceway and cable clips
Water
Express Water RO5DX - $160
I saw this recommended by @Naturescapes_Rocco, and feel like the value is pretty hard to beat. I waited until it was on sale to purchase, but even at the $190 list price, it's great. Water source is an artesian spring (well). From the tap, TDS measures 56. In my 5g, I've used water straight from the tap, but opted for RO so I can keep things consistent with this setup. TDS after initial filter flushing was 0 (yeah, 0!).
55 Gallon Brute Trash Can, 44 Gallon Brute Trash Can, 32 Gallon Greenmade Trash Can, and 2x dollys.I need to improve this setup because it's a PITA. RO goes into the 55g, then I need to transfer it to the 44g to fill the tank. The 32g was originally what I purchased because that was the biggest Costco had, but it didn't hold enough water to fill the tank, so I had to rethink my plans. Seeing the 55g in person, I wasn't confident I could fit 2 side by side in the space I set up the RO in (which I couldn't). This setup is very clunky and requires a lot of water moving to make it to the tank. I've been using the 32g for waste water so I could water plants with it, but I might get worn down quickly and send it down the drain.
Plants (all UNS TC)- Homalomena Sp Sekadau South (babysitter)
- Hydrocotyle Tripartita (potentially babysitter)
- Alternanthera Reineckii Rosanervig (initially planned as babysitter, but may keep some in long term)
- Hemianthus Callitrichoides 'Cuba'
- Rotala Rotundifolia Blood Red
- Anubias Nana Petite
- Micranthemum 'Monte Carlo'
- Alternanthera Reineckii 'Mini'
- Echinodorus Rose
Coming soon
- 25x Red Neon Blue Eye Rainbow
- 7x C005 Corydoras pantanalensis
- 3x C123 Yellow Cory 'Rio Nanay'
- Aphyosemion bivittatum 'Funge' Pair
- 5x Stiphodon rutilaureus Goby
- 1x True Siamese Algae Eaters
- 1x Bamboo Shrimp
- 8x Amano Shrimp
54 replies
·
3257 views

328 replies
·
17991 views
Hello Welcome, astrobooger
Welcome to ScapeCrunch, @astrobooger!
We would love to get to know you. Please tell us about yourself. What tank do you have?
We would love to get to know you. Please tell us about yourself. What tank do you have?
5 replies
·
82 views