
Welcome to ScapeCrunch
We are ScapeCrunch, the place where planted aquarium hobbyists come to build relationships and support each other. When you're tired of doom scrolling, you've found your home here.
Social Feed

Founding Member
Hello all, I used to be a regular across a few forums, but as of late I have backed off and have not been active at all. I am glad to have found this site and to see a few familiar members are actively posting. This might be a very long introduction post - you've been warned.
My name is Zach and I've always had tank(s) on the go. I started planted tanking about 14 years ago and I continue to learn new things each and every day.
My current tanks are a bit neglected. It's funny how life seems to just push forward, and soon enough your behind on a water change or two, that algae you had under control pops up again, you forget to mix up a batch of fertilizer and before you know it, you have a mess on your hands! - I hope you all enjoy the small moments where you can sit back, relax and watch your tanks as I do, regardless of how they look at that specific time.
Between a new job and building my garage / shop by myself, my tanks took a back seat. Then the news hit that I'll be a first time dad so my tanks were really put on hold as I prepped our house. Hopefully when the snow flies shortly I'll be able to fit my tanks into my schedule again.
Here are my current tanks, with a few older photo's:
45g Long - 48" x 12" x 18"
5 x 54w T5-HO
CO2 @ 25cc's / min
RO water target dosed to: 20ppm NO3, 7ppm PO4, 25ppm K, 30ppm Ca, 10ppm Mg
70% weekly water changes (every 2 weeks currently)
Rainbows mostly, with cherry barbs, angels and some corys (more on this in a minute)
ADA Aquasoil V2
40g Breeder - 36" x 18" x 16"
Low tech
Single, budget friendly RGB LED, 30 watts, on 75% power
50% water changes with tapwater (soft) target dosed with "some" Ca and "some" Mg
Osmocote Plus tabs only
Pool filter sand
1 super red bushy nose pleco, 1 remaining discus (more on this in a minute)
120g High - 60" x 18" x 26"
Currently empty with a breached bottom seal
So my struggles as of recent:
(keep in mind all of my time is spent building my shop / new job / dad-to-be during all of this)
45g was always meant to be my high tech tank, pushing PAR, CO2 and fertilizer to the limits. Rainbows and cherry barbs were the only planned livestock, lots of coloured up stem plants and a nice selection of "rare" colourful broad leaf plants. This was my first kick at the can with an active substrate, so it was also a bit experimental for me. I moved twice with this tank, and all 3 homes had a completely different water sources, so I've always used 100% RO. I recently swapped to my tapwater because I'm on a well now, and it's fairly soft + much easier to perform water changes. As soon as I swapped to tapwater though, plants took a huge hit, my aquasoil immediately began to break down, and the tank turned into a blackwater tank. I think I have it under control now, but algae is very much present and plants are not loving life. I'm just trying to hold on to a few of the species I really like until I can get around to a tank renovation. Eventually this tank will merge into a 6' 125 gallon tank - adjusting any aspect as I see fit for my "style" of keeping a tank.
40g Breeder was always meant to be a grow out tank for some small discus - easy to perform large water changes, nice wide footprint, and the price was spot on. When I figured out a larger tank, this 40g would become a perfect DIY sump. So I picked up 5 small discus to start - I've always wanted to try my take on discus, with some corys and a small school of cardinal tetra. Everything was going fairly well except they weren't really eating (brine shrimp, beef heart, flake, pellets, sticks). After some good (and bad) research, I got them devouring bloodworms and I figured this is great, fed them multiple times a day, everyone is happy - but they were not growing. Then they started losing weight, with clear symptoms of parasites in their feces. I got my hands on some meds and treated the whole tank - I was left with 3 of the 5.
At this point a 120 gallon was offered to me from a family member free of charge. It had their turtle in it and they were getting rid of her, so I said absolutely I'll take that tank off your hands! It held water with no issues at all (had a turtle a bunch of feeder goldies in it). I gave it some TLC and had that tank looking 90% brand new, I was happy. I built a stand to match our furniture, my partner agreed we could keep this tank in our living space (instead of in the basement "fish room"). I figured now would be best to get those discus out of the 40g and start fresh. So I set it up, and everything was perfect. Plants looked great, steady growth, no algae, simple design to focus more so on the fish. Over a few weeks, 2 of the 3 discus would eat (no bloodworms anymore, went right to brine shrimp and pellets). The other one would not touch anything. Then one morning before a business trip (I had 1 hour to leave the house from when I woke up) I was greeted by the sound of water splashing from the filters, and the tank 1/3 drained. My first thought would be a seal went bad on a filter, I've had that happen in the past, so I rushed and felt around the filters - bone dry! So I scrambled, grabbed a 45 gallon tote, transferred the fish, filters and heaters into it, drained the tank / removed the plants, threw every towel we own around the tank and set up every fan we own on high. I went about my business trip, and didn't enjoy 1 minute of it.
So, everything is now back into the 40g Breeder were the 1 never started eating again, and the last 2 discus fought and fought until one day, new dog found a discus dried up next to the tank leaving me with 1 discus remaining. The 120 gallon I will reseal over the winter and try again.
What has kept me motivated is the growth and colours of my rainbows. I am feeding them a lot, feeding them a varied diet of high quality foods and it's paying off - they look great.
So, if you've made it this far, here are some older photo's from when I had had everything under control! I'll make sure I snap a few photo's of how the tank actually look right now and post them a little later on.


My name is Zach and I've always had tank(s) on the go. I started planted tanking about 14 years ago and I continue to learn new things each and every day.
My current tanks are a bit neglected. It's funny how life seems to just push forward, and soon enough your behind on a water change or two, that algae you had under control pops up again, you forget to mix up a batch of fertilizer and before you know it, you have a mess on your hands! - I hope you all enjoy the small moments where you can sit back, relax and watch your tanks as I do, regardless of how they look at that specific time.
Between a new job and building my garage / shop by myself, my tanks took a back seat. Then the news hit that I'll be a first time dad so my tanks were really put on hold as I prepped our house. Hopefully when the snow flies shortly I'll be able to fit my tanks into my schedule again.
Here are my current tanks, with a few older photo's:
45g Long - 48" x 12" x 18"
5 x 54w T5-HO
CO2 @ 25cc's / min
RO water target dosed to: 20ppm NO3, 7ppm PO4, 25ppm K, 30ppm Ca, 10ppm Mg
70% weekly water changes (every 2 weeks currently)
Rainbows mostly, with cherry barbs, angels and some corys (more on this in a minute)
ADA Aquasoil V2
40g Breeder - 36" x 18" x 16"
Low tech
Single, budget friendly RGB LED, 30 watts, on 75% power
50% water changes with tapwater (soft) target dosed with "some" Ca and "some" Mg
Osmocote Plus tabs only
Pool filter sand
1 super red bushy nose pleco, 1 remaining discus (more on this in a minute)
120g High - 60" x 18" x 26"
Currently empty with a breached bottom seal
So my struggles as of recent:
(keep in mind all of my time is spent building my shop / new job / dad-to-be during all of this)
45g was always meant to be my high tech tank, pushing PAR, CO2 and fertilizer to the limits. Rainbows and cherry barbs were the only planned livestock, lots of coloured up stem plants and a nice selection of "rare" colourful broad leaf plants. This was my first kick at the can with an active substrate, so it was also a bit experimental for me. I moved twice with this tank, and all 3 homes had a completely different water sources, so I've always used 100% RO. I recently swapped to my tapwater because I'm on a well now, and it's fairly soft + much easier to perform water changes. As soon as I swapped to tapwater though, plants took a huge hit, my aquasoil immediately began to break down, and the tank turned into a blackwater tank. I think I have it under control now, but algae is very much present and plants are not loving life. I'm just trying to hold on to a few of the species I really like until I can get around to a tank renovation. Eventually this tank will merge into a 6' 125 gallon tank - adjusting any aspect as I see fit for my "style" of keeping a tank.
40g Breeder was always meant to be a grow out tank for some small discus - easy to perform large water changes, nice wide footprint, and the price was spot on. When I figured out a larger tank, this 40g would become a perfect DIY sump. So I picked up 5 small discus to start - I've always wanted to try my take on discus, with some corys and a small school of cardinal tetra. Everything was going fairly well except they weren't really eating (brine shrimp, beef heart, flake, pellets, sticks). After some good (and bad) research, I got them devouring bloodworms and I figured this is great, fed them multiple times a day, everyone is happy - but they were not growing. Then they started losing weight, with clear symptoms of parasites in their feces. I got my hands on some meds and treated the whole tank - I was left with 3 of the 5.
At this point a 120 gallon was offered to me from a family member free of charge. It had their turtle in it and they were getting rid of her, so I said absolutely I'll take that tank off your hands! It held water with no issues at all (had a turtle a bunch of feeder goldies in it). I gave it some TLC and had that tank looking 90% brand new, I was happy. I built a stand to match our furniture, my partner agreed we could keep this tank in our living space (instead of in the basement "fish room"). I figured now would be best to get those discus out of the 40g and start fresh. So I set it up, and everything was perfect. Plants looked great, steady growth, no algae, simple design to focus more so on the fish. Over a few weeks, 2 of the 3 discus would eat (no bloodworms anymore, went right to brine shrimp and pellets). The other one would not touch anything. Then one morning before a business trip (I had 1 hour to leave the house from when I woke up) I was greeted by the sound of water splashing from the filters, and the tank 1/3 drained. My first thought would be a seal went bad on a filter, I've had that happen in the past, so I rushed and felt around the filters - bone dry! So I scrambled, grabbed a 45 gallon tote, transferred the fish, filters and heaters into it, drained the tank / removed the plants, threw every towel we own around the tank and set up every fan we own on high. I went about my business trip, and didn't enjoy 1 minute of it.
So, everything is now back into the 40g Breeder were the 1 never started eating again, and the last 2 discus fought and fought until one day, new dog found a discus dried up next to the tank leaving me with 1 discus remaining. The 120 gallon I will reseal over the winter and try again.
What has kept me motivated is the growth and colours of my rainbows. I am feeding them a lot, feeding them a varied diet of high quality foods and it's paying off - they look great.
So, if you've made it this far, here are some older photo's from when I had had everything under control! I'll make sure I snap a few photo's of how the tank actually look right now and post them a little later on.
82 Replies
·
19920 views


Supporting
I Donated 2026
Rockstar
Journal Kwyet’s 60G Hillstream Tank
Sometime in Nov 2024, I bought a 60G Aqueon tank at the 50% off sale. I already had a 75 gallon stand and tank, but I wanted a shorter tank so I could look in over the top. The 75 gallon was relegated to the garage in case I want it again, and I painted the stand black. I also put black vinyl on the back.
My goal was to make a hillstream environment, based on the long-running tank of Rachel O’Leary. I had looked at other options like the river manifolds, but I liked Rachel’s better. I set it up with an fx6 filter, a horizontal spray bar on the left side, and 2nd modified spray bar situated vertically behind a corner Matten filter on the back right side. Glass strips were attached with silicone to hold it. I cut the Matten filter horizontally a few inches from the tank floor so the top part could be easily removed for cleaning. I also cut a small vertical groove from the inside so it wouldn’t constrict the holes so much on the curve.
This was how it looked on Dec 20, 2024:

My goal was to make a hillstream environment, based on the long-running tank of Rachel O’Leary. I had looked at other options like the river manifolds, but I liked Rachel’s better. I set it up with an fx6 filter, a horizontal spray bar on the left side, and 2nd modified spray bar situated vertically behind a corner Matten filter on the back right side. Glass strips were attached with silicone to hold it. I cut the Matten filter horizontally a few inches from the tank floor so the top part could be easily removed for cleaning. I also cut a small vertical groove from the inside so it wouldn’t constrict the holes so much on the curve.
This was how it looked on Dec 20, 2024:
44 Replies
·
5516 views

Supporting
I Donated 2026
Rockstar
When I was walking around Aquashella Chicago, I crossed paths multiple times with Logan Rando while he was filming. I was wondering if he had posted a video of the show yet so I checked out his channel. No video of Chicago yet, so I instead watched his video of New Jersey. About half way through the video, Father Fish rolls by on his scooter and announces he'll be making an announcement that will destroy the tropical fish industry. LOL! I didn't know Father Fish was actually a speaker at Aquashella. Seems funny that a guy who preaches about not giving money to the aquarium industry was invited to speak. I figured WTH, I'll bite and go to his channel to see what the big news was. I couldn't bring myself to watch the whole thing, but I did scan through it and still don't know what the big Earth shattering news was. Just the same ole preachy stuff and I regret destroying the brain cells. I have to be more careful of that, as I'm older and can't afford to lose many more. I'm sure glad my path into this hobby was seeing the work of Takashi Amano, other knowledgeable aquascapers, and all the great folks in this community.
5 Replies
·
95 views


Staff member
I Donated 2026
Founding Member
Announcement September 2026 Media of the Month Contest Winner!
Please join me in congratulating @Jeff Miotke as the September 2026 Media of the Month winner!
This is the winning photo:
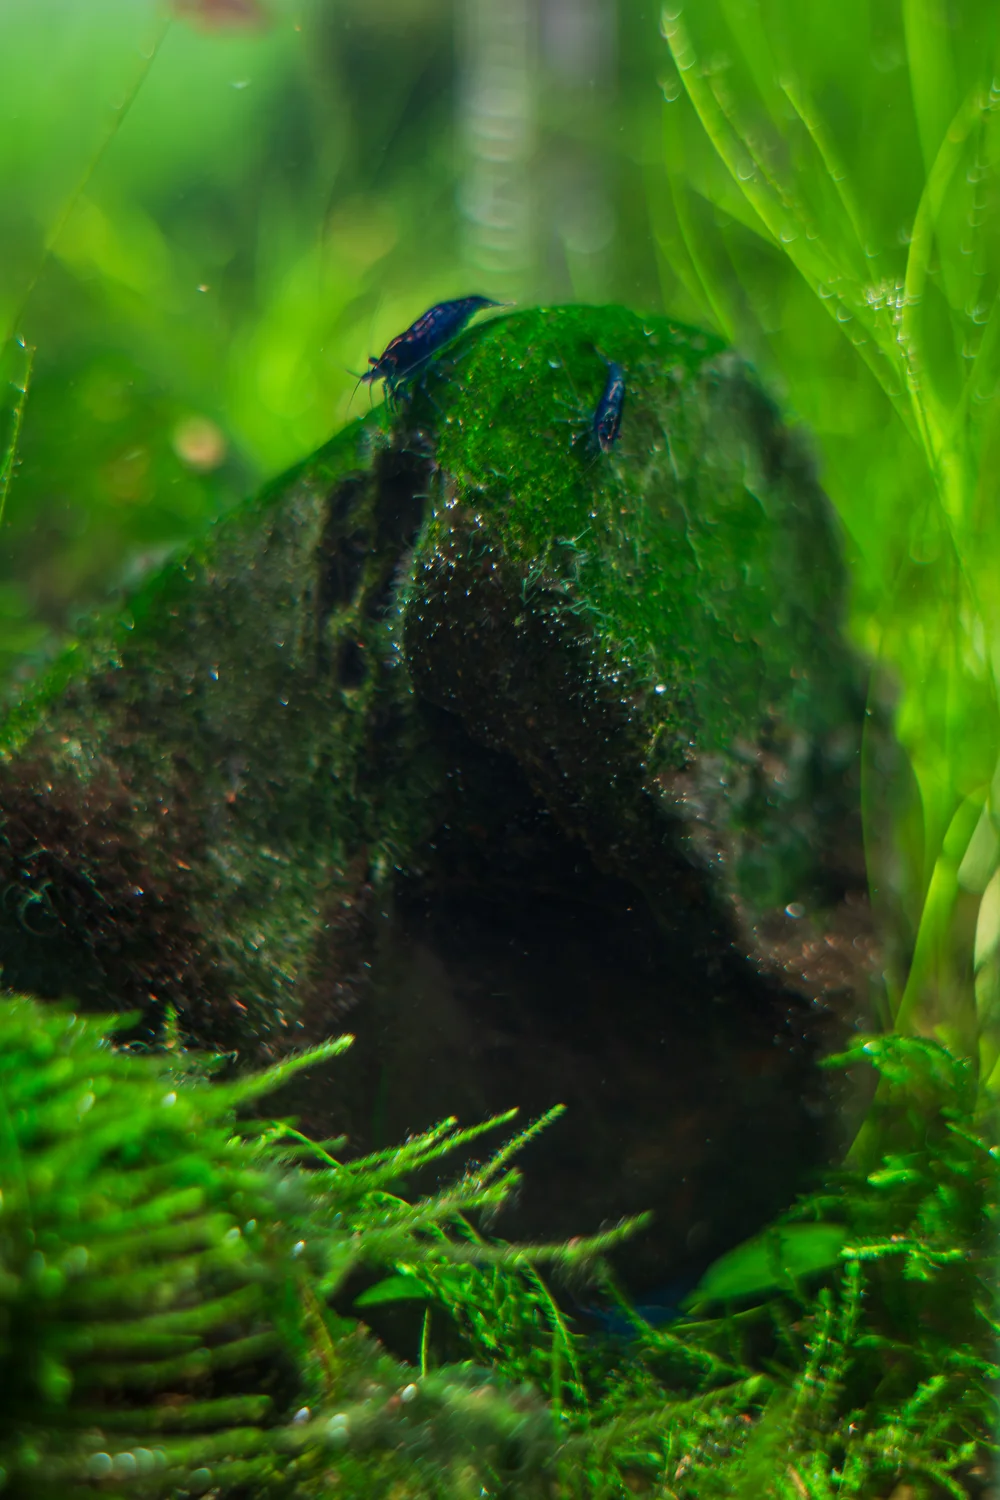
They win a $25 gift certificate from BurrAqua!

Congratulations for second place winner @Kwyet and third place winner @MrJG!
This is the winning photo:
They win a $25 gift certificate from BurrAqua!
Congratulations for second place winner @Kwyet and third place winner @MrJG!
0 Replies
·
15 views
I'm looking to switch ferts I have a 20g low tech and 40g high tech both currently getting a mix of apt 1 and 3. I'm wanting to switch to pps pro using the gla salts (cheaper and gets my foot in the door with the dry ferts) for both tanks, but I've seen some recommend against it for low tech, I have no issues dosing daily, actually prefer it, and if I understand correctly, its actually better for the tank as far as stable nutrient levels. My question is, can this be done? Is it really that much of an issue to go pps pro on a low tech? I really want 1 solution (i.e. macro micro mixes) for both problems (the two tanks (obviously they'll need their own amounts as for as dose size)). I'm limited to 20 gallons of clean water at a time (remineralized with apt sky plus to 6 GH since I have neos, amanos and snails) due to space constraints so I can either do weekly 25% changes on the tanks or 50% changes every other week. Any and all input is welcome. TIA 
7 Replies
·
112 views

Rockstar
I mention this plant on occasion, but no one ever comments. So I thought I'd make a post for others and me for future reference.
It is my favorite Erio. It is a darker green, doesn't get too big, and for me it has never sent up any seed stalks.
I find it easy to grow. I have high light but nothing crazy at 124PAR and high CO2, 50+ppm. It gets about max 3-4" and makes side daughter plants when large. I'm not sure my dosing scheme is. Sort of an EI daily dosing kind of thing.
What gets me is every autumn, it starts to melt. I'm not sure how it knows it's autumn with consistent light and a heater, but it must get a little cooler in the tank or something. The plant starts to turn brown and sends up (I'm not sure of the correct term) vegetative stalks with little plantlets on the ends. I've found you can plant these stalks into the substrate with the plantlet on top, and it will grow into a new plant. They've been easy to grow. This is the third year this has happened to me.
Pic of plantlets below. I'll try to get a better one sometime. All I had time for tonight was a crappy phone pic.
This year I divided one of the mother plants in hopes that it wouldn't fully melt and would regrow. That is still in progress.
Anyone else's experiences are welcome.
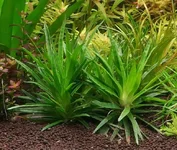
This plant is the same plant as the one on the right above.

It is my favorite Erio. It is a darker green, doesn't get too big, and for me it has never sent up any seed stalks.
I find it easy to grow. I have high light but nothing crazy at 124PAR and high CO2, 50+ppm. It gets about max 3-4" and makes side daughter plants when large. I'm not sure my dosing scheme is. Sort of an EI daily dosing kind of thing.
What gets me is every autumn, it starts to melt. I'm not sure how it knows it's autumn with consistent light and a heater, but it must get a little cooler in the tank or something. The plant starts to turn brown and sends up (I'm not sure of the correct term) vegetative stalks with little plantlets on the ends. I've found you can plant these stalks into the substrate with the plantlet on top, and it will grow into a new plant. They've been easy to grow. This is the third year this has happened to me.
Pic of plantlets below. I'll try to get a better one sometime. All I had time for tonight was a crappy phone pic.
This year I divided one of the mother plants in hopes that it wouldn't fully melt and would regrow. That is still in progress.
Anyone else's experiences are welcome.
This plant is the same plant as the one on the right above.
5 Replies
·
107 views

Got on the tree build kick in past 2 weeks to make somthing I like for 36g freebie build to replace the huge tree turd #2 in there. I got 6 stumps ready today to get built for smaller tanks, 3 done today 3 waiting. Built the larger 17 tall 16 wide tree pics added other day to journal but gonna a build 2-3 more larger trees and the 6 smaller. Sell the ones off on eBay and etsy I don't want.
The larger stump 2nd post pic s 16" tall 15 wide plan to use in future scapes smaller. I've been using Amazon branch packs 15.00 for 25-35 pieces and amazon spiderwood 6-8" 5 for 12.00 for small trees. The large tree I made was a 10.99 piece I tore apart and used the 3 larger branches and built onto them to get the large tree in added pics cost me in end around 22.00 .... I have 10 pieces coming in mail Friday 5 large and 5 medium all spiderwood to make larger trees with this weekend.
Bought a ton of Amazon wood on Amazon lol 2 for 17.00 10-14" so I glued some of them together for larger usable pieces. some came out cool and well worth the 17.00 for the pieces glued together.The 1 has natural plant pots on top. The v shape last 2 pics 12" deep and 16" wide
After literally glueing a finger to a rock today Imao I quit! I ended up used all the accelerator I had anyway so Friday or sat before I can finish my smaller trees. will update as it goes, It will be a forest of trees when its done.
The larger stump 2nd post pic s 16" tall 15 wide plan to use in future scapes smaller. I've been using Amazon branch packs 15.00 for 25-35 pieces and amazon spiderwood 6-8" 5 for 12.00 for small trees. The large tree I made was a 10.99 piece I tore apart and used the 3 larger branches and built onto them to get the large tree in added pics cost me in end around 22.00 .... I have 10 pieces coming in mail Friday 5 large and 5 medium all spiderwood to make larger trees with this weekend.
Bought a ton of Amazon wood on Amazon lol 2 for 17.00 10-14" so I glued some of them together for larger usable pieces. some came out cool and well worth the 17.00 for the pieces glued together.The 1 has natural plant pots on top. The v shape last 2 pics 12" deep and 16" wide
After literally glueing a finger to a rock today Imao I quit! I ended up used all the accelerator I had anyway so Friday or sat before I can finish my smaller trees. will update as it goes, It will be a forest of trees when its done.


3 Replies
·
46 views
Staff member
I Donated 2026
Founding Member
Hello Welcome, Binnhim
Welcome to ScapeCrunch, @Binnhim!
We would love to get to know you. Please tell us about yourself. What tank do you have?
We would love to get to know you. Please tell us about yourself. What tank do you have?
2 Replies
·
55 views
Staff member
I Donated 2026
Founding Member
Hello Welcome, Poppet7B9
Welcome to ScapeCrunch, @Poppet7B9!
We would love to get to know you. Please tell us about yourself. What tank do you have?
We would love to get to know you. Please tell us about yourself. What tank do you have?
0 Replies
·
14 views
Has anyone ever kept Dwarf Neon Rainbows (Melanotaenia praecox) with goldfish?
I have 4 fancy goldfish (either Fantails, Orandas, or some sort of hybrid of the two). They are around 4–5 inches each. I also have a school of 8 Dwarf Neon Rainbows in another tank (2 males, 6 females).
The rainbows are super sensitive to CO₂. The moment I cross around 30 ppm in my planted tank, I can see them struggling, so I’m thinking of shifting them to the goldfish tank, which has no CO₂.
The goldfish tank is 300 litres (4 × 2 × 2 ft / 80 gallons), and the rainbows are around 1.5–1.75 inches.
Usually people say no to goldfish tank mates, mainly because of a mismatch in temperature or temperament. But in this case:
I have 4 fancy goldfish (either Fantails, Orandas, or some sort of hybrid of the two). They are around 4–5 inches each. I also have a school of 8 Dwarf Neon Rainbows in another tank (2 males, 6 females).
The rainbows are super sensitive to CO₂. The moment I cross around 30 ppm in my planted tank, I can see them struggling, so I’m thinking of shifting them to the goldfish tank, which has no CO₂.
The goldfish tank is 300 litres (4 × 2 × 2 ft / 80 gallons), and the rainbows are around 1.5–1.75 inches.
Usually people say no to goldfish tank mates, mainly because of a mismatch in temperature or temperament. But in this case:
- The goldies cannot possibly eat the rainbows at their current size.
- The rainbows don’t fin nip, or at least I’ve never seen them do it.
- The water parameters in both tanks are quite similar.
- Goldfish tank: GH 6, KH 2
- Current rainbow tank: GH 4, KH 0
- Temperature is pretty much the same in both tanks: 24–25°C (74–77°F).
4 Replies
·
98 views
Staff member
I Donated 2026
Founding Member
This month's theme is: plant, hardscape and fish
This one is going to be tough but I hope some of you take up the challenge. Take a picture that captures a plant, some hardscape and at least one fish in the same picture.
Be as artistic and creative as you like.
The rules:
A $25 store credit from BurrAqua thanks to @Burr740!

This one is going to be tough but I hope some of you take up the challenge. Take a picture that captures a plant, some hardscape and at least one fish in the same picture.
Be as artistic and creative as you like.
The rules:
- Submissions are allowed between October 7 and October 23.
- Voting will start on October 23 at 12:01 am Eastern time.
- Voting will end on October 31 at 11:30 pm Eastern time.
A $25 store credit from BurrAqua thanks to @Burr740!
0 Replies
·
40 views