
Welcome to ScapeCrunch
We are ScapeCrunch, the place where planted aquarium hobbyists come to build relationships and support each other. When you're tired of doom scrolling, you've found your home here.
Social Feed

Hi all, first post. Thought it'd be fine to start a new thread specifically about yugang reactors for smaller tanks, under surface area 3000cm^2 (for the most part). Guess this could be a journal to some degree, but I think this thread is more for info than sharing my tank. I know people are generally using pvc pipes and fittings to DIY their reactors and to keep the cost down. I wanted something that looked super nice and was already "prebuilt". After scouring the internet for the longest time, I found that these PC water cooling reservoirs should serve that purpose.

Maybe someone's tested this already and found out that it doesn't work, but I wanted to put this out there since I haven't seen anything on it. I don't want to gatekeep this and I hope that this gives people another option since not everyone may have tools readily available. Since this is considered a PC component, there are a number of options available for fittings that I'll get into in a bit that make this great.
There are a few downsides though:
1. Limited diameters. I've only seen options for 50 or 60mm diameters. The 50mm ones have 40mm inner diameter, and 60mm ones I assume have 50mm inner.
2. Limited lengths. I've seen them as small as 6cm long all the way to 40cm long. The caps/lids range from 6-10mm thick.
Largest I've seen is 50mm and 400mm long. Useable diameter and length, let's say are 40mm and 380mm respectively. If you want a pH drop of 1.5, largest your surface area can be is 2690cm^2. Obviously you can stretch this if you don't need that large of a pH drop.


3. Standardized G 1/4" thread. This isn't as common a fitting (in the US at least). This thread size can be good or bad.
4. Some others mentioned later.
As for the upsides:
1. Clean look, no DIY necessary, no PVC glue, certain listings come with brackets and screws.
2. Inexpensive, I got a 210mm variant for ~$15USD
3. Outlet is offset to the side. You can rotate as necessary to control in overflow mode.
4. Others mentioned later.
Again, this is for PC water cooling. 95% of the parts I've seen are made of brass. They are however either chrome or nickel plated.
As of right now, I have my ADA 60P freshly cycling on a dark start. I was able to test the co2 functionality (not measure co2 levels). I am able to get a co2 bubble to develop inside and work with overflow. My "reactor" is 210mm long and has 50mm diameter. Calculating with the inner diameter (40mm on mine) and the useable length (190mm if you take away cap length), I should theoretically be able to get a ~1.4ph drop.
The filter I'm using is the Biomaster 350 thermo. Tubing is 5/8" for this, and this is one of the downsides I want to get into. This is for PC cooling like I mentioned and they generally don't use tubing that large. If you're running a filter that uses 12/16mm tubing instead of 5/8" (16/22mm) then you might have a much easier time finding fittings to work. G 1/4" thread is roughly a 1/2" opening. I'm not actually getting less flow with this because I realized the 16/22 quick tap valves I use actually have a 1/2" opening on the inside as well. This G 1/4" thread shouldn't be an issue then. FYI, G 1/4" is the same as 1/4" BSPP. (british standard pipe parallel)

I tried making my setup as NEATLY and good looking as possible. Above is my final work (as of now). I have some tube trimming to do though to make it nicer. Another thing I want to mention, the first time I tried this, I connected my outlet straight to the yugang reactor. I saw this thread reply (below) saying that their 2" pvc (~50mm) had no issue with the flow speed after adjusting their tap valve. That was not true in my experience. My reactor should be about the same size as this one, but the water rushes through very turbently:

It slowed the flow so much that almost all water was going through bypass even though valve was fully open. (Don't get cheap Y or T splitters either...)
Here's a video of the flow WITHOUT a bypass. Video starts with tap valve already slightly shut 25% of the way and slowly getting shut more as you can see:
View attachment IMG_7536.mov
It doesn't matter where you put the valve but I think it makes more sense to put it on the reactor side. You can control how slow the flow is that way. Ff you place it on bypass side, you can never slow down water through reactor that way - only more going to it.
You might ask, where's the co2 supposed to go if you don't have the inline accessory that I have? Well there's a threaded acrylic pipe that comes with this reactor if you look at listings. All you need to do is get a 4/6mm push connect to g1/4" male thread fitting for a few bucks and your issue is solved. The threaded acrylic pipe can also be screwed off and there are more extender fittings and such to replace that if you search them online. Options like the 60mm length reservoir I posted above may only have 2 outlets, but the larger 400mm example I gave has 4 holes with different hole positions too. You can place a purge valve that slightly works (there's literally a fitting for that too). The main outlet hole is still offset as well. (another example shown below) Any hole you don't want to use? Just buy a g1/4 plug. The benefit of using this PC cooling reservoir is the amount of fittings they have that can work for your needs.

For my setup, I ended up using a $3 dollar plastic garden hose splitter that has 3/4" GHT (garden hose thread) that was two valves on it (best of both worlds). I also bought the appropriate barbs to fit into it (so hosing can attach). Because I wanted to put this is my AquaForestAquarium Archaea cabinet, everything is packed really tight. Would be nicer if tubing had more room to move and didn't kink as easily. Just a tradeoff so you see I had to use elbow barbs and keep some tubing real short.
My fittings right now are brass but I found one seller on ebay (shipped from China) that has G 1/4" male thread to 5/8" barb in STAINLESS STEEL. However, it is BSPT (british standard pipe thread) so this one tapers inwards and will probably need teflon/very tight twist to seal with the o-ring. BSPT fitting can go into a BSPP threaded hole, but BSPP cannot go into BSPT. Someone correct me if I'm wrong about that, but I'm fairly certain that is the case.
If you've read to this point, I think this should be enough to understand what you can do with this PC cooling reservoir. It has limitations size wise and a need for a bypass if you don't want to slow the flow on your tank too much (depending on your filter), but it really is a nice cheap option that we can use for our hobby.
Please correct or question me anywhere!!!
--------------------------------------------
Just links to what I bought for anyone curious. I hope links are allowed. I don't have any commission to these. Just purely for info on what I have.
You can buy these for cheaper on AliExpress. I just didn't want to wait and paid a little more for the items. They're from the same supplier, but I also recommend finding a higher quality brand. The one I have is 50mm outer diameter. I think companies like Freezemod have higher quality ones, and they might be 60mm. Do your own research on this, I didn't do enough on this side.

Some other hard to find accessories:
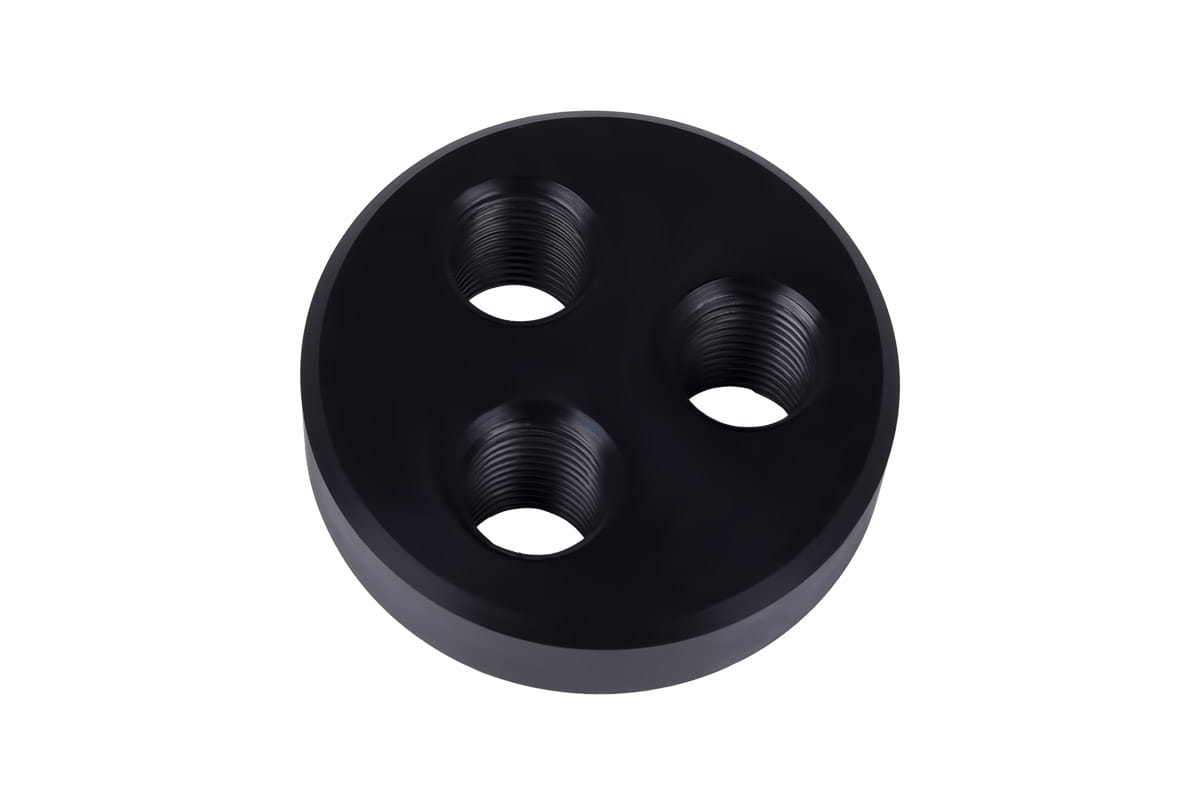
- If you're trying to replace inlet cap, make sure the cap you find works. Here's one I found for 50mm diameter:
 shop.alphacool.com
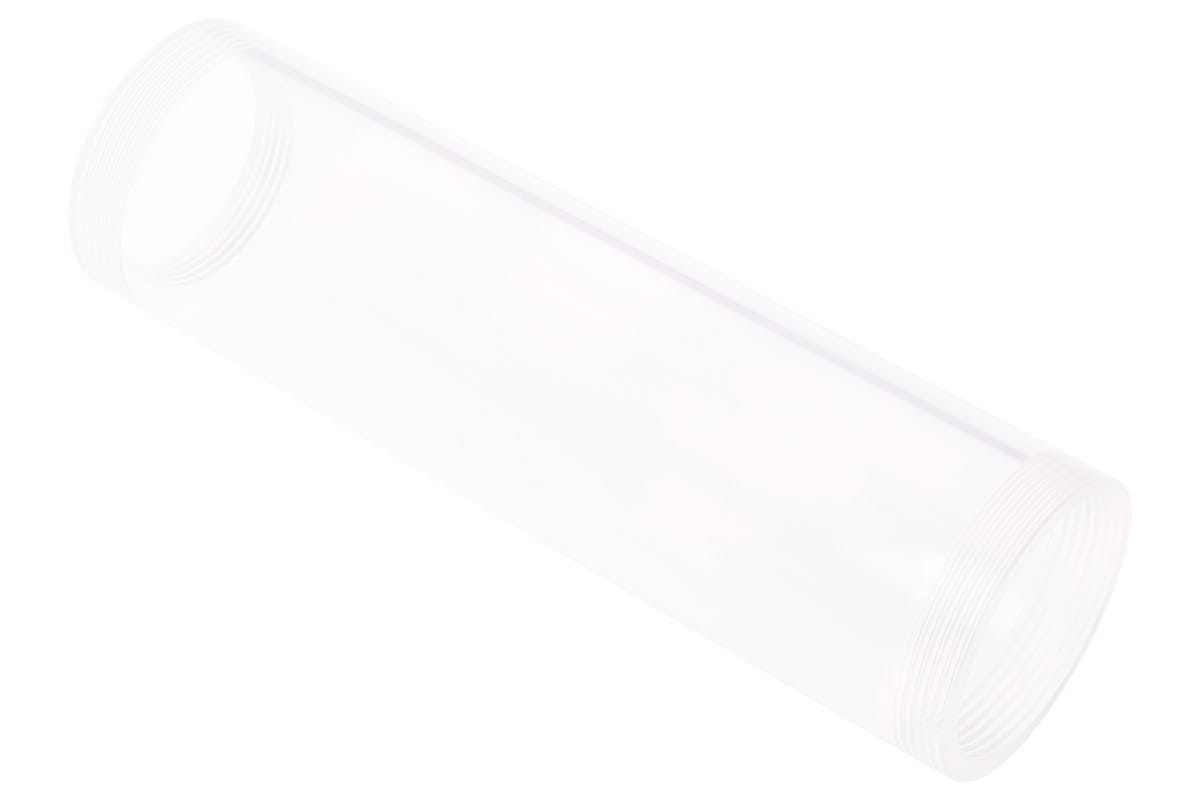
- I believe the acrylic reservoir itself is this (please check yourself!!):
shop.alphacool.com
- I believe the acrylic reservoir itself is this (please check yourself!!):
 shop.alphacool.com
- This one is super nice, it's a rotatable cap replacement you can get. Set your in/outlets exactly where you want. I'm not sure if 50 or 60mm diameter though:
shop.alphacool.com
- This one is super nice, it's a rotatable cap replacement you can get. Set your in/outlets exactly where you want. I'm not sure if 50 or 60mm diameter though:
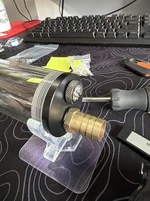
I also mentioned not wanting to have to drill anything. You might wonder how to attach those brackets without doing so. I bought adhesive stickers with screw ports from AliExpress, and used screws/washers that came with the reservoir:

Can probably get on Amazon as well. The adhesive first, then stack 3 washers next, bracket next, thread the screw through the bracket hole -> washers -> adhesive screw port.
-------------------------------
Random thought:
I found this one singular option that I've not tested. It looks so similar to the internal bypass option that yugang himself devised. (a prebuilt option at least) It's slotted but to be honest, I don't know if it would work well. If you search for aluminum pc water cooling reservoir, you will find this. Only comes in one size unfortunately. Again, I have NOT tested this.


Maybe someone's tested this already and found out that it doesn't work, but I wanted to put this out there since I haven't seen anything on it. I don't want to gatekeep this and I hope that this gives people another option since not everyone may have tools readily available. Since this is considered a PC component, there are a number of options available for fittings that I'll get into in a bit that make this great.
There are a few downsides though:
1. Limited diameters. I've only seen options for 50 or 60mm diameters. The 50mm ones have 40mm inner diameter, and 60mm ones I assume have 50mm inner.
2. Limited lengths. I've seen them as small as 6cm long all the way to 40cm long. The caps/lids range from 6-10mm thick.
Largest I've seen is 50mm and 400mm long. Useable diameter and length, let's say are 40mm and 380mm respectively. If you want a pH drop of 1.5, largest your surface area can be is 2690cm^2. Obviously you can stretch this if you don't need that large of a pH drop.
3. Standardized G 1/4" thread. This isn't as common a fitting (in the US at least). This thread size can be good or bad.
4. Some others mentioned later.
As for the upsides:
1. Clean look, no DIY necessary, no PVC glue, certain listings come with brackets and screws.
2. Inexpensive, I got a 210mm variant for ~$15USD
3. Outlet is offset to the side. You can rotate as necessary to control in overflow mode.
4. Others mentioned later.
Again, this is for PC water cooling. 95% of the parts I've seen are made of brass. They are however either chrome or nickel plated.
Not sure if this will be an issue since brass is ~60% copper. Hamfist's tank is also huge compared to my 60p and it may be dependent on water changes. Having the plating on the fittings will lower the corrosion rate since we are in acidic lower pH water. I honestly don't think this should be a problem at all. There are acrylic and stainless steel options out there if you look for them. I've heard nickel plating is best.
As of right now, I have my ADA 60P freshly cycling on a dark start. I was able to test the co2 functionality (not measure co2 levels). I am able to get a co2 bubble to develop inside and work with overflow. My "reactor" is 210mm long and has 50mm diameter. Calculating with the inner diameter (40mm on mine) and the useable length (190mm if you take away cap length), I should theoretically be able to get a ~1.4ph drop.
The filter I'm using is the Biomaster 350 thermo. Tubing is 5/8" for this, and this is one of the downsides I want to get into. This is for PC cooling like I mentioned and they generally don't use tubing that large. If you're running a filter that uses 12/16mm tubing instead of 5/8" (16/22mm) then you might have a much easier time finding fittings to work. G 1/4" thread is roughly a 1/2" opening. I'm not actually getting less flow with this because I realized the 16/22 quick tap valves I use actually have a 1/2" opening on the inside as well. This G 1/4" thread shouldn't be an issue then. FYI, G 1/4" is the same as 1/4" BSPP. (british standard pipe parallel)
I tried making my setup as NEATLY and good looking as possible. Above is my final work (as of now). I have some tube trimming to do though to make it nicer. Another thing I want to mention, the first time I tried this, I connected my outlet straight to the yugang reactor. I saw this thread reply (below) saying that their 2" pvc (~50mm) had no issue with the flow speed after adjusting their tap valve. That was not true in my experience. My reactor should be about the same size as this one, but the water rushes through very turbently:
And so I had to resort to making a simple bypass. One lesson I learned, don't get a cheap valve on amazon for $5. I placed the valve on the bypass initially:
It slowed the flow so much that almost all water was going through bypass even though valve was fully open. (Don't get cheap Y or T splitters either...)
Here's a video of the flow WITHOUT a bypass. Video starts with tap valve already slightly shut 25% of the way and slowly getting shut more as you can see:
View attachment IMG_7536.mov
It doesn't matter where you put the valve but I think it makes more sense to put it on the reactor side. You can control how slow the flow is that way. Ff you place it on bypass side, you can never slow down water through reactor that way - only more going to it.
You might ask, where's the co2 supposed to go if you don't have the inline accessory that I have? Well there's a threaded acrylic pipe that comes with this reactor if you look at listings. All you need to do is get a 4/6mm push connect to g1/4" male thread fitting for a few bucks and your issue is solved. The threaded acrylic pipe can also be screwed off and there are more extender fittings and such to replace that if you search them online. Options like the 60mm length reservoir I posted above may only have 2 outlets, but the larger 400mm example I gave has 4 holes with different hole positions too. You can place a purge valve that slightly works (there's literally a fitting for that too). The main outlet hole is still offset as well. (another example shown below) Any hole you don't want to use? Just buy a g1/4 plug. The benefit of using this PC cooling reservoir is the amount of fittings they have that can work for your needs.
For my setup, I ended up using a $3 dollar plastic garden hose splitter that has 3/4" GHT (garden hose thread) that was two valves on it (best of both worlds). I also bought the appropriate barbs to fit into it (so hosing can attach). Because I wanted to put this is my AquaForestAquarium Archaea cabinet, everything is packed really tight. Would be nicer if tubing had more room to move and didn't kink as easily. Just a tradeoff so you see I had to use elbow barbs and keep some tubing real short.
My fittings right now are brass but I found one seller on ebay (shipped from China) that has G 1/4" male thread to 5/8" barb in STAINLESS STEEL. However, it is BSPT (british standard pipe thread) so this one tapers inwards and will probably need teflon/very tight twist to seal with the o-ring. BSPT fitting can go into a BSPP threaded hole, but BSPP cannot go into BSPT. Someone correct me if I'm wrong about that, but I'm fairly certain that is the case.
If you've read to this point, I think this should be enough to understand what you can do with this PC cooling reservoir. It has limitations size wise and a need for a bypass if you don't want to slow the flow on your tank too much (depending on your filter), but it really is a nice cheap option that we can use for our hobby.
Please correct or question me anywhere!!!
--------------------------------------------
Just links to what I bought for anyone curious. I hope links are allowed. I don't have any commission to these. Just purely for info on what I have.
Amazon.com: uxcell G1/4 Inner Hex Head Pipe Fitting Plug, Universal 304 Stainless Steel Thread Socket Plug with Green O-Ring for Terminate Pipe Ends or Replacement Drains : Industrial & Scientific
Amazon.com: uxcell G1/4 Inner Hex Head Pipe Fitting Plug, Universal 304 Stainless Steel Thread Socket Plug with Green O-Ring for Terminate Pipe Ends or Replacement Drains : Industrial & Scientific
a.co
You can buy these for cheaper on AliExpress. I just didn't want to wait and paid a little more for the items. They're from the same supplier, but I also recommend finding a higher quality brand. The one I have is 50mm outer diameter. I think companies like Freezemod have higher quality ones, and they might be 60mm. Do your own research on this, I didn't do enough on this side.
Some other hard to find accessories:
- If you're trying to replace inlet cap, make sure the cap you find works. Here's one I found for 50mm diameter:
AGZ Alphacool Cape Coolplex Base POM 3 Bar EOL
Alphacool accessories and spare parts! The original accessories for your water cooling directly from the manufacturer!
shop.alphacool.com
AGZ Alphacool Ice Cream Cup Acrylic Tube 60x205mm
Alphacool accessories and spare parts! The original accessories for your water cooling directly from the manufacturer!
shop.alphacool.com

I also mentioned not wanting to have to drill anything. You might wonder how to attach those brackets without doing so. I bought adhesive stickers with screw ports from AliExpress, and used screws/washers that came with the reservoir:
Can probably get on Amazon as well. The adhesive first, then stack 3 washers next, bracket next, thread the screw through the bracket hole -> washers -> adhesive screw port.
-------------------------------
Random thought:
I found this one singular option that I've not tested. It looks so similar to the internal bypass option that yugang himself devised. (a prebuilt option at least) It's slotted but to be honest, I don't know if it would work well. If you search for aluminum pc water cooling reservoir, you will find this. Only comes in one size unfortunately. Again, I have NOT tested this.


17 Replies
·
1405 views


Staff member
I Donated 2026
Founding Member
This is the future home for the announcements when someone obtains an achievement badge. Let the games begin!
2050 Replies
·
75086 views
Hello, can anyone running the ARC small acrylic reactor on a 40 breeder tell me what your outlet position is and what ph drop or co2 ppm you are getting?
3 Replies
·
50 views

Rockstar
I mention this plant on occasion, but no one ever comments. So I thought I'd make a post for others and me for future reference.
It is my favorite Erio. It is a darker green, doesn't get too big, and for me it has never sent up any seed stalks.
I find it easy to grow. I have high light but nothing crazy at 124PAR and high CO2, 50+ppm. It gets about max 3-4" and makes side daughter plants when large. I'm not sure my dosing scheme is. Sort of an EI daily dosing kind of thing.
What gets me is every autumn, it starts to melt. I'm not sure how it knows it's autumn with consistent light and a heater, but it must get a little cooler in the tank or something. The plant starts to turn brown and sends up (I'm not sure of the correct term) vegetative stalks with little plantlets on the ends. I've found you can plant these stalks into the substrate with the plantlet on top, and it will grow into a new plant. They've been easy to grow. This is the third year this has happened to me.
Pic of plantlets below. I'll try to get a better one sometime. All I had time for tonight was a crappy phone pic.
This year I divided one of the mother plants in hopes that it wouldn't fully melt and would regrow. That is still in progress.
Anyone else's experiences are welcome.
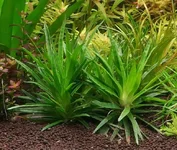
This plant is the same plant as the one on the right above.

It is my favorite Erio. It is a darker green, doesn't get too big, and for me it has never sent up any seed stalks.
I find it easy to grow. I have high light but nothing crazy at 124PAR and high CO2, 50+ppm. It gets about max 3-4" and makes side daughter plants when large. I'm not sure my dosing scheme is. Sort of an EI daily dosing kind of thing.
What gets me is every autumn, it starts to melt. I'm not sure how it knows it's autumn with consistent light and a heater, but it must get a little cooler in the tank or something. The plant starts to turn brown and sends up (I'm not sure of the correct term) vegetative stalks with little plantlets on the ends. I've found you can plant these stalks into the substrate with the plantlet on top, and it will grow into a new plant. They've been easy to grow. This is the third year this has happened to me.
Pic of plantlets below. I'll try to get a better one sometime. All I had time for tonight was a crappy phone pic.
This year I divided one of the mother plants in hopes that it wouldn't fully melt and would regrow. That is still in progress.
Anyone else's experiences are welcome.
This plant is the same plant as the one on the right above.
0 Replies
·
15 views
Staff member
I Donated 2026
Founding Member
Hello Welcome, Binnhim
Welcome to ScapeCrunch, @Binnhim!
We would love to get to know you. Please tell us about yourself. What tank do you have?
We would love to get to know you. Please tell us about yourself. What tank do you have?
1 Replies
·
9 views
Hi everyone, I'm curious. My pH is 0 and my GH is 7. My pH is 5.5/5.6 all day. I use CO2 24/7. My pH drop is 1.6/1.7. I degas the water with an air pump for two hours, then I check every hour until the pH becomes stable. Why does the drop control always stay green? Isn't the pH drop high for a 0KH? Should it be yellow? Or am I wrong? Thank you very much.

12 Replies
·
822 views

Journal Quantum Entanglement
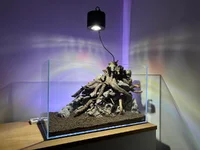
My new scape. It’s been a while. I’ve been busy finishing my novel. It’s published now so back to scaping.
It’s a classic triangular scape and I’m calling it Quantum Entanglement. It’s a working title, so I might change that. Sorry mods.
The real star is the light. Off Amazon for around $130. Fully controllable with a remote. Great value. https://amzn.eu/d/0eRX5eCo
I want to plant it with mainly buces and small anubias spp. on the rocks and wood and MC carpet, with some crypt nevellii or C. X Willisii, and stauro in the shady parts and maybe a ludwigia mini super red highlight behind the last rock on the left.
It’s a classic triangular scape and I’m calling it Quantum Entanglement. It’s a working title, so I might change that. Sorry mods.
The real star is the light. Off Amazon for around $130. Fully controllable with a remote. Great value. https://amzn.eu/d/0eRX5eCo
I want to plant it with mainly buces and small anubias spp. on the rocks and wood and MC carpet, with some crypt nevellii or C. X Willisii, and stauro in the shady parts and maybe a ludwigia mini super red highlight behind the last rock on the left.
17 Replies
·
327 views


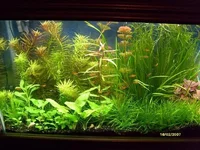
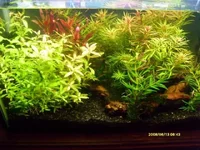
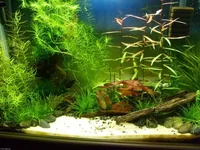
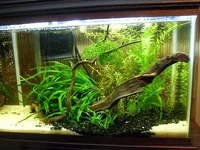
I feel i need to do a journal so I have a internet calendar on what's happened or Ill forget lol! This is now 4 months back into the planted tank world and I'm happy to be back yet lost on true aquascapingI I have a current 29g as a farm tank for future builds going. zrdr 4l co2 bought locally full setup for 40.00, 29g free. A 20long I just bought with metal stand, hygger decent new led light.new heater. few foam bubble filters, ar a nice dual air pump. some new stratum about 16lbs , tons of good food, etc etc and 6 live plants crypts, swords, anubis about 30 stems of rotundifolia 12" tall for 85,00 it was a decent deal with what is came with , I thought!
Original plans was a 29 and 20 long. Well 3 weeks forward to 3 days ago picked up a free 36 bow front with stand, foods.heater, some dragon stone, bubbler all working freeby deal of the year for sure! The tanks pretty clean, some light hard water stains lll razor blade off very clean. Did come with about 35lbs stratum and blk rocks mix.
I threw substrate in tank after light rinse. LOL it went to pitch blk even after 2 big filters with filter floss still blk water after 36 hours later its muck now the stratum is crap imo other than deeper substrate to cover up with build. I have no clue on any age of the stratum 2 months or 5 years no info was free on side of road literally. I decided today to dump the stratum its a dam mess! may strain the stratum with my several size buckets to strain out small materials away from the blk gravel and use it with eco!? Just got 2 20lb bags of eco complete for 55 shipped my 2005 go to, easy no breakdown and same cost as bulk gravel from pet stores in the end.
I Would do the blk blasting sand its cheaper but don't want all sand and in end as I still do some gravel clean monthly oops.. The eco complete last imo forever I have 20 year old eco now in tank. Yeah its inert but still whole rocks. I"Ill be posting many pics of the my dry scapes holy hell! And more as it goes. Its been 19 years since I've done a planted tank def not a newbie just don't remember as much as I did and things have changed any help appreciated for sure! Joe burr has been help sure thanks dutchscape god!
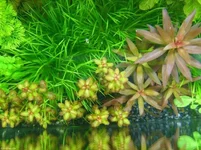
Posted few pics of old tanks 19 years ago when I didn't know what an aquascape was lol no co2 just dry ferts, metride 14 and power compacts it worked! algae was very null. Im calling my new tanks the cheap skape 20 and now 36g the freebie. I usually try to go cheapo as I can get Im not rich rather spend 30.00 on steaks at home than 30.00 on stems lol. I'm mr diy I only buy what I cant build usually.
Original plans was a 29 and 20 long. Well 3 weeks forward to 3 days ago picked up a free 36 bow front with stand, foods.heater, some dragon stone, bubbler all working freeby deal of the year for sure! The tanks pretty clean, some light hard water stains lll razor blade off very clean. Did come with about 35lbs stratum and blk rocks mix.
I threw substrate in tank after light rinse. LOL it went to pitch blk even after 2 big filters with filter floss still blk water after 36 hours later its muck now the stratum is crap imo other than deeper substrate to cover up with build. I have no clue on any age of the stratum 2 months or 5 years no info was free on side of road literally. I decided today to dump the stratum its a dam mess! may strain the stratum with my several size buckets to strain out small materials away from the blk gravel and use it with eco!? Just got 2 20lb bags of eco complete for 55 shipped my 2005 go to, easy no breakdown and same cost as bulk gravel from pet stores in the end.
I Would do the blk blasting sand its cheaper but don't want all sand and in end as I still do some gravel clean monthly oops.. The eco complete last imo forever I have 20 year old eco now in tank. Yeah its inert but still whole rocks. I"Ill be posting many pics of the my dry scapes holy hell! And more as it goes. Its been 19 years since I've done a planted tank def not a newbie just don't remember as much as I did and things have changed any help appreciated for sure! Joe burr has been help sure thanks dutchscape god!
Posted few pics of old tanks 19 years ago when I didn't know what an aquascape was lol no co2 just dry ferts, metride 14 and power compacts it worked! algae was very null. Im calling my new tanks the cheap skape 20 and now 36g the freebie. I usually try to go cheapo as I can get Im not rich rather spend 30.00 on steaks at home than 30.00 on stems lol. I'm mr diy I only buy what I cant build usually.
19 Replies
·
1192 views


Supporting
I Donated 2026
Rockstar
I hadn't seen it mentioned by others that attended Aquashella, but if you hadn't already heard about it or seen it in Aquashella videos, ADA has come out with Amazonia Pro. It's not a replacement for Version 2, but an addition. It is essentially Version 2 on steroids with higher nutrients and of course the negative side effect of potentially higher initial ammonia leaching and, if your not prepared and skilled, more chance of algae. That's even from the mouth of Homma-san himself. The scaping competitors were using it in the competition and AFA was selling 9l bags at the show. They said it would be available on the website within the next couple weeks.
40 Replies
·
963 views

In my never ending quest to piddle around, I have been looking at setting up a nano eco tank/bowl with minimum maintenance. The main issue I have is controlling the temp. The temps in my house fluctuate between 68 - 71 degree regularly and can drop to lower 60s a few weeks in the fall and spring when we do not have the heater on.
Has anyone thought about or had success using an animal heating pad under the bowl/tank? While most are designed for reptiles and regulate between 100-120F, there are some for more mixed use that can be controlled from 68F and up. I don't think this would be too hard to set up. Could be to keep the inside of the tank clear of equipment. Radiant floor heating for your shrimp/fish.
Heating Pad
Has anyone thought about or had success using an animal heating pad under the bowl/tank? While most are designed for reptiles and regulate between 100-120F, there are some for more mixed use that can be controlled from 68F and up. I don't think this would be too hard to set up. Could be to keep the inside of the tank clear of equipment. Radiant floor heating for your shrimp/fish.
Heating Pad
10 Replies
·
131 views
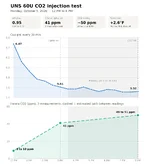
Got inspired by @Naturescapes_Rocco So I decided to do a full day of testing on my CO₂ levels yesterday for my UNS 60U before I add livestock, and I put together a graph. It was a pretty interesting test. My CO₂ comes on at 12 PM (3 hours before lights), lights run between 3–9 PM, and CO₂ shuts off at 8 PM. Injection during this test was 66 bubbles in 30 seconds, which equates to roughly (2.2 BPS)
I used an Apera PH60 for the pH curve and a Hanna HI3818 CO₂ titration kit to independently check CO₂ concentration
Current water parameters are GH 5 and KH 0
Hanna results:
12 PM (pre-injection): 8–10 ppm
3 PM (lights on): 41 ppm
8 PM: 49–51 ppm
pH went from 6.47 pre-injection → 5.61 by lights on, giving me a 0.86 pH drop by the start of the photoperiod. From there, it continued down into the ~5.5x range and plateaued through the rest of the photoperiod, putting the total drop at roughly 0.9–1.0 pH
Planned livestock is Cardinal Tetras, Pygmy cories, a few Amano shrimp, and eventually Caridina shrimp as the tank matures
What was interesting about this test was that as the photoperiod started, I was right where I wanted to be. It held a pretty steady curve, but later in the evening, just as the lights were about to go off, levels reached a little higher than I'd like. Ideally, I'd like to be somewhere around 40–45 ppm throughout the entire photoperiod, so I slightly adjusted my injection rate down to about 60 bubbles every 30 seconds, which equates to roughly (2 BPS)
I probably could've done just fine with livestock at my current rate, as I know guys like @Dennis Wong and Tom Barr run their tanks around ~50 ppm peak, but I know some shrimp, especially Caridina, can be sensitive to higher CO₂ levels. I'd rather be a little more conservative and play it safe. Plants are all doing very well
I'm going to do another full-day test at the new injection rate and see how the tank reacts. Hopefully I can balance the curve a little better and stay closer to that 40–45 ppm range throughout the entire photoperiod
I may also need to increase the CO₂ duration and start injection about 3½ hours before lights on instead of 3 hours. Ideally, I'd like CO₂ to already be around my target concentration when the lights come on rather than continuing to build afterward
Curious what those of you who run higher CO₂ with livestock think about this approach, especially those keeping shrimp. Has anyone else ever done a similar test?
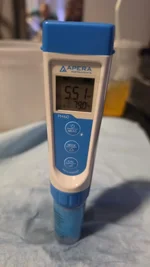
I used an Apera PH60 for the pH curve and a Hanna HI3818 CO₂ titration kit to independently check CO₂ concentration
Current water parameters are GH 5 and KH 0
Hanna results:
12 PM (pre-injection): 8–10 ppm
3 PM (lights on): 41 ppm
8 PM: 49–51 ppm
pH went from 6.47 pre-injection → 5.61 by lights on, giving me a 0.86 pH drop by the start of the photoperiod. From there, it continued down into the ~5.5x range and plateaued through the rest of the photoperiod, putting the total drop at roughly 0.9–1.0 pH
Planned livestock is Cardinal Tetras, Pygmy cories, a few Amano shrimp, and eventually Caridina shrimp as the tank matures
What was interesting about this test was that as the photoperiod started, I was right where I wanted to be. It held a pretty steady curve, but later in the evening, just as the lights were about to go off, levels reached a little higher than I'd like. Ideally, I'd like to be somewhere around 40–45 ppm throughout the entire photoperiod, so I slightly adjusted my injection rate down to about 60 bubbles every 30 seconds, which equates to roughly (2 BPS)
I probably could've done just fine with livestock at my current rate, as I know guys like @Dennis Wong and Tom Barr run their tanks around ~50 ppm peak, but I know some shrimp, especially Caridina, can be sensitive to higher CO₂ levels. I'd rather be a little more conservative and play it safe. Plants are all doing very well
I'm going to do another full-day test at the new injection rate and see how the tank reacts. Hopefully I can balance the curve a little better and stay closer to that 40–45 ppm range throughout the entire photoperiod
I may also need to increase the CO₂ duration and start injection about 3½ hours before lights on instead of 3 hours. Ideally, I'd like CO₂ to already be around my target concentration when the lights come on rather than continuing to build afterward
Curious what those of you who run higher CO₂ with livestock think about this approach, especially those keeping shrimp. Has anyone else ever done a similar test?
5 Replies
·
58 views