We are ScapeCrunch, the place where planted aquarium hobbyists come to build relationships and support each other. When you're tired of doom scrolling, you've found your home here.
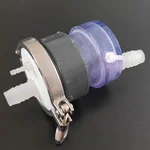
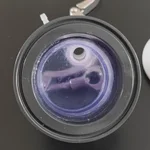
I chose to go with a tri-clamp on the inlet side for easy cleaning (if ever needed) and stepless adjustment by rotating the reactor. It also allows me to put in some styrofoam to further tweak the internal surface area of needed, which Yugang suggested in one of his posts at some point.
Great build. I would be a little cautious with the 1.5 pH drop target. When I made my yugang, I thought that it was meant to be designed with a pH drop in reference to your degassed tank water pH. I WAS WRONG.
What happens is that your tank produces some CO₂ on its own through decomp. & microbial activity, and this means that your tank water can never be fully degassed. The tank equilibrium CO₂ level will always sit below degassed water's pH. For example, my tank's degassed pH is 7.3 (this is if I shake the water and let it sit outdoors for a few hours), but my pH before starting CO₂ injection is around 6.8 (water in tank never fully degasses). This pH of 6.8 is what I consider to be my tank's equilibrium pH (the pH where my tank rests without CO₂ injection from a pressurized system), which accounts for CO₂ that the water holds due to microbial activity. So I designed my yugang for a pH drop of 1.4, which dropped my pH from my equilibrium pH of 6.8 to my CO₂-injected pH of 5.4 (corresponding to a CO₂ level of 65 ppm).
The conclusion is that, if you're not aware of the pH of your tank before CO₂ injection and how much CO₂ your tank is producing on its own before injection, then you might oversize your yugang. I'm not saying that you have oversized your reactor. I'm saying that you should have provisions within your design to regulate your reactor for smaller pH drops if necessary.
No you're very right to point that out, and I actually think I might have misunderstood what Yugang's reference for the pH drop is. From his writing, I assumed he always used completely degassed water at 0.6 ppm CO2 as a reference, such that a 1.5 drop Yugang reactor would yield 0.6 ppm x 10^1.5 = 19 ppm CO2, going up to 30 ppm if your initial water is just a little higher in CO2 at 1 ppm.
What I would like as the maximum output is a 1 pH drop from somewhat, but likely not completely, degassed tank water, which should be around 2-3 ppm CO2 as described by 2hr aquarist. I expext to be on the lower end of this as I will have very low bioload with just shrimp and a few fish, maybe. This should put me right at 20-30 ppm CO2 at maximum output with a 1 pH drop. But if what Yugang refers to when stating the pH drop of capacity is actually also in reference to 2-3 ppm water and not 0.6 ppm water, then yeah, I totally oversized! Reading his stuff again, seems I should indeed go for roughly the 35 ratio. Not sure why I misunderstood that in the first place. Well, actually I do know. It's because he says that fully degassed water should be used as the standard reference for measuring pH drop, but he doesn't actually state that anywhere in relation to the reactor, totally my bad. Thanks for pointing that out.
What I'm worried about with an even smaller reactor would be noise and slower saturation, as you write in your journal. How has your experience with noise been? That's my main concern.
In the end, it would also always be possible to reduce output by adding blockers or switching to regulator mode, but if course I'd prefer overflow mode.
I used tri-clamps for years with my homebrewing equipment, but it never occured to me there were plastic fittings like this I could use with them as well. Thank you for the eureka moment.
Happy to help and thanks! It's "just" a PVC ferrule with a tri-clamp standard end. I say "just" because it was stupidly difficult to find. I actually got it while in China from Taobao (their Amazon, but much larger and with a massive selection) and only found one vendor selling them. Most other standard products have dozens of vendors on there, so I think it might be difficult to source in the West. Seems like such an intuitive piece to manufacture though! Had my own eureka moment when I found it, because it would probably work so well.
No you're very right to point that out, and I actually think I might have misunderstood what Yugang's reference for the pH drop is. From his writing, I assumed he always used completely degassed water at 0.6 ppm CO2 as a reference, such that a 1.5 drop Yugang reactor would yield 0.6 ppm x 10^1.5 = 19 ppm CO2, going up to 30 ppm if your initial water is just a little higher in CO2 at 1 ppm.
What I would like as the maximum output is a 1 pH drop from somewhat, but likely not completely, degassed tank water, which should be around 2-3 ppm CO2 as described by 2hr aquarist. I expext to be on the lower end of this as I will have very low bioload with just shrimp and a few fish, maybe. This should put me right at 20-30 ppm CO2 at maximum output with a 1 pH drop. But if what Yugang refers to when stating the pH drop of capacity is actually also in reference to 2-3 ppm water and not 0.6 ppm water, then yeah, I totally oversized! Reading his stuff again, seems I should indeed go for roughly the 35 ratio. Not sure why I misunderstood that in the first place. Well, actually I do know. It's because he says that fully degassed water should be used as the standard reference for measuring pH drop, but he doesn't actually state that anywhere in relation to the reactor, totally my bad. Thanks for pointing that out.
What I'm worried about with an even smaller reactor would be noise and slower saturation, as you write in your journal. How has your experience with noise been? That's my main concern.
In the end, it would also always be possible to reduce output by adding blockers or switching to regulator mode, but if course I'd prefer overflow mode.
Happy to help and thanks! It's "just" a PVC ferrule with a tri-clamp standard end. I say "just" because it was stupidly difficult to find. I actually got it while in China from Taobao (their Amazon, but much larger and with a massive selection) and only found one vendor selling them. Most other standard products have dozens of vendors on there, so I think it might be difficult to source in the West. Seems like such an intuitive piece to manufacture though! Had my own eureka moment when I found it, because it would probably work so well.
There's really no way to solve the slower saturation issue on a mini-yugang other than turning it on 3-4 hours before the lights come on. But given the efficiency of the Yugang, you will still end up saving CO₂.. I had to inject 6 bps for a pH drop of 1.5 with a regular reactor; now with the Yugang, I inject 4.5 bps for a pH drop of 2.0.
My Yugang is quiet, no sounds at all. The acoustic issues with the reactor show up when you have a lot of flow rushing through the Yugang. The best way to solve it is by adding a bypass with the flow regulator on the Yugang side. All you need is a gentle flow into the yugang. My yugang has a bypass on it, and that is how I would suggest everyone build it, whether their yugang is big or small. This is because it gives you flow control, but more importantly, orienting the bypass above the yugang will allow purged air from the filter to go directly into your bypass instead of into the reactor. So even if your filter starts purging air in the middle of CO₂ injection, none of it will enter the Yugang chamber.
Thanks for sharing your experience. I'll make a shorter reactor and see how it works out. I can always make a bypass later if needed, or a new reactor. Searching for the pieces was definitely the most difficult part.
I was hoping to get by without a bypass for now since my reactor pipe diameter is so large, as it was originally specced for a 30 gal tank, but leading air into the bypass rather than the reactor is a very clever advantage/additional good reason to get a bypass!
Ended up with a very chunky look, and the clean aesthetic got lost on contact with my lacking glueing and siliconing skills. Like for many others here, it was my first time doing either of those, and especially the PVC cement dried out much faster than I expected from practising a bit with it before.
The clear endcap was also way too tight to fit even while dry, so I had to sand it down pretty aggressively to get it to fit over the pipe.
I recessed the purge thread into the pipe, so it's nicely flush from the inside. Didn't quite trust my application of the PVC cement, so I gave the internal seams an extra layer of food safe silicone. Especially the outlet got some extra because it's threaded, not smooth, and thus didn't have a lot of contact area with the pipe. Since I couldn't fit the lock nut with how close I wanted the outlet to be near the edge for adjustability, the PVC cement and silicone are what's holding the outlet feedthrough in place, hoping it holds
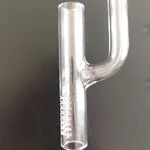
Also picked up the fixed inlet, good as new! Even better actually, now the joint is stronger than before. I also really recommend you look at some glass through a polariscope if you have the option, it highlights stress in a fancy color map.
Besides that, today is scaping day, finally! We're going to take out all the plants and give them a good scrub while we're at it. Algae is still very present in the tank, and while some plants are doing much better than before, some new algae has shown up, and there's even some green hair algae growing in the substrate. I'd appreciate any tips on how to proceed. Just slow and steady with current parameters (6 hours light, 20 ppmNO3 with APT 3, some CO2) and let it fix itself (with some help, of course) or blackout? I'm thinking the first, maybe with reduced fertilizer because of the currently low CO2, and would appreciate any input!
Here you can see how the glass is absolutely covered in hair (?) algae even though I scrubbed it down some days ago.
It's also growing long strings on some of the plants that have it worst.
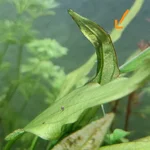
Oddly, the Amazon Swords have the most problems. The big Sword is totally overrun in some places and is growing these tufts of grey algae here and there. It also has one leaf that is curling up a lot.
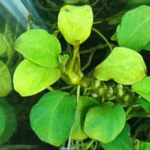
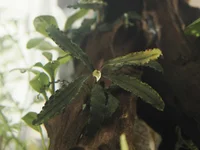
The small anubias has been shooting out lighter leaves. Would that not usually indicate a nitrogen deficiency? It came from a low tech, no fertilizer environment, and though there was a significant bioload there, surely that can't be the case here, right?
Moving on to good news, a friend gifted me some beautiful plants! Here to hoping I don't ruin them. I got:
Bucephalandra sordidula "Blue"
Bucephalandra sp. "Biblis"
Cryptocoryne nevilii
Cryptocoryne willisii
Kind of running out of space here, so I had to improvise with the last buce
Here we finally are! I've been pretty busy throughout the week and wanted to get some nice pictures (and kept on forgetting to take them), but we got the tank scaped and planted last weekend. Another reason I didn't update until now is because I wanted to get a good number of pH readings for dialing in CO2. Unfortunately, the pH pen I got is barely usable, taking multiple minutes of swooshing back and forth in a sample to get a reading even remotely close to stable, which is frankly unbearable. Any suggestions for a type that works better?
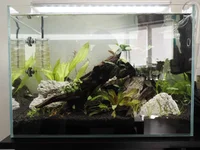
Back to the tank. We're very happy with how it turned out, especially considering that this was all with hardscape bought for a 125 L / 30 gal tank.
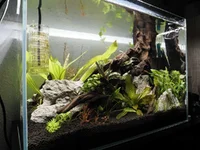
Here are some pictures taken immediately after setting things up (better ones further down). We had a really cool piece of wood (in front) that could form a natural bridge when inverted and wanted to combine that with another wooden bridge and a stone bridge in the 125 L, and we were very happy that we could fit at least one bridge in here! I got a separate piece of wood from a local (in back), which fit nicely along the first to create an additional arch. The wood oddly is not realeasing any noticeable tannins at all. I did boil it for a bit, but no more than an hour each.
The stones are millenium stone and should only very slightly raise pH, GH and KH. So far KH still reads 0 before each water change, so all seems good there. We added some more aquasoil to get more of a slope towards the back right corner, since our viewing will be from the front and front left.
We paid attention to keeping all areas reasonably accessible for cleaning and maintenance. Some places are a little iffy, but most of it works fine.
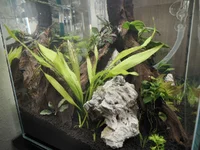
You might see that our planting strategy mostly came down to what we had and "this looks nice here", which I think some plants did not like (more on that later). For now, pictures!
And some of the individual plants.
I absolutely love the bucephalandra sordidula "Blue". The broad, shimmering leaves are stunning, and I can't wait to see it under better lighting (which is in the works).
We added some more aquasoil to get more of a slope towards the back right corner, since our viewing will be from the front and front left. Speaking of viewing, here are images I took yesterday evening without the extreme sun glare we have all throughout the day here.
We're sadly still not using the Yugang. It had a very strong solvent smell for a few days, so I let it air out some more. I probably applied too much PVC cement, but it seems fine now and I'll hook it up next water change to fix the CO2 situation.
Which brings me to this post's bad news, algae again! For the first three to four days there was essentially no algae to see anywhere, but it's been showing up again now. I would guess it's due to the low CO2 levels and adaptation stress. But to be exhaustive, we did also treat the tank with No Planaria (plant and bacteria safe), which might result in a lot of organic waste as organisms die off, but NH4, NO2 and NO3 are all good.
Currently light is on for 6 hours a day, and we dose incoming water to EI low light/weekly levels (10 ppm NO3). As mentioned, I wanted to dial CO2 in more, but the pH pen is not making that easy. I've been increasing the dose slowly and the drop checker turns a nice saturated green now, so at least some CO2 is there. My plan going forward would be more frequent water changes and continued manual removal of algae. Since NH4 and NO2 are consistently undetectable we're thinking of getting the first inhabitants, namely some otocinclus, amano and (neo)caridina shrimp to help a little. Might be best to wait until things are more stable and mature, though?
Anyways, here are some pictures. Hopefully you can help me diagnose what's wrong
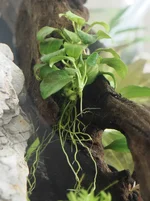
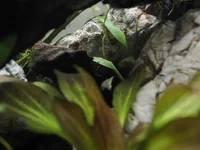
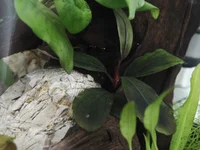
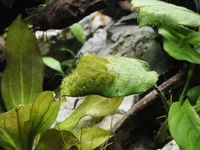
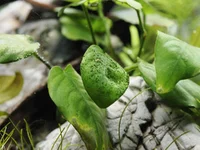
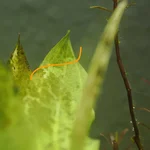
The anubias nana was hit very hard with this brown/green overgrowth on one leaf and some melting on two others. I guess that might be because of how high up we placed it at first. Now it's further down toward the substrate.
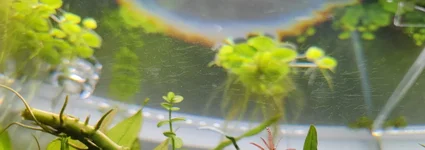
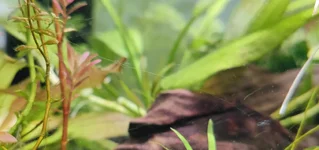
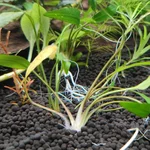
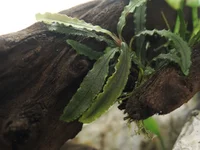
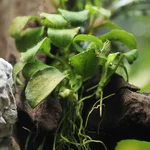
Another victim of my bad placement might be this buce sp. Biblis. It was almost at the water's surface and promptly melted Also moved it further down now. On the other hand, I learned that crypt nevilii and willisii like high light, so those will be shifted around a bit as well.
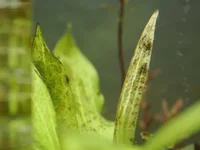
Sadly, the Ozelot Red has also been getting worse. It has one leaf that;s also being overgrown and another two that have black filamentous algae growing on them.
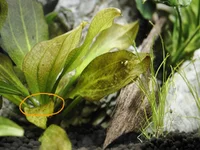
The big Amazon Sword might actually have it the worst. It has some leaves that were pretty badly damaged already, which I guess made it susceptible to attack. There is some really aggresive growth of filamentous algae on it (underlined below for visibility) and bushels of BBA .
Lastly, this anubias mini coin has one leaf with a similar brown overgrowth. It's more blotchy and dark than it appears here.
That's it for this update! I hope I can get the algae under control and would appreciate any tips for things I should and should not be doing. One thing I've also thought might eventually be a problem is the flow in the tank. The middle is fairly closed off, could that be problematic? For now, I'll wait and see if there's an accumulation of detritus there over time.
Definitely for the damaged leaves and the leaves with the most algae attack, trim them right off
Yes adaptation stress in the first weeks! Turn the lights down to low - moderate, and keep nutrition and CO2 good and steady. Solid new growth will come it's just a matter of waiting it out
Definitely for the damaged leaves and the leaves with the most algae attack, trim them right off
Yes adaptation stress in the first weeks! Turn the lights down to low - moderate, and keep nutrition and CO2 good and steady. Solid new growth will come it's just a matter of waiting it out
Got it, thanks! I figured that would be the way to go, great to have some reassurance. I'm a little worried about the large, slow-growers, but I can see some new growth on them already.
Most other plants are also doing great. Especially the stem plants are almost all algae free and growing like crazy, so I suppose the slower growers will adapt at their own pace
If you look back at my journal(s), no one around here can claim to has recently fought as much algae as me. For me the secret has been daily dosing and arms in the tank cleaning off algae and trimming infected leaves. Its harder with slow growing things like Buce and Anubias, but you can get it done and you get back on your feet faster than you realize. Good luck.
If you look back at my journal(s), no one around here can claim to has recently fought as much algae as me. For me the secret has been daily dosing and arms in the tank cleaning off algae and trimming infected leaves. Its harder with slow growing things like Buce and Anubias, but you can get it done and you get back on your feet faster than you realize. Good luck.
Sorry for the late reply! Thanks for the encouragement. Took a look, woof. Good job clearing that up! I definitely worry too much, but I think that might be natural as a beginner. There are so many examples online of people who start up and get completely overrun by algae and drop the hobby again. Trying to avoid that to the best of my ability, and I think I've set myself up for success with all my preparation.
I'm not sure I understand why daily dosing would be a benefit, though. I'm aware that it is recommended by many fertilizer manufacturers to do multiple doses a week, but it seems to contradict the "stability-is-key" mantra? If one doesn't dose within the ballpark of consumption, it will lead either to gradual depletion or accumulation of fertilizer throughout the week, no? In my mind, a big up-front dose supplemented with one or two mid-week doses seems more stable. Happy to have this explained to me though!
I'm not sure I understand why daily dosing would be a benefit, though. I'm aware that it is recommended by many fertilizer manufacturers to do multiple doses a week, but it seems to contradict the "stability-is-key" mantra? If one doesn't dose within the ballpark of consumption,
That's what you do. (or at least what I do). If I start the week with about 20ppm NO3 and dose a small amount daily. At the end of the week, I have 20ppm. I do a 50% water change which would take me to down to 10ppm. Then I add 10ppm to top back to 20ppm. So my NO3 stays consistent all week at 20ppm. This isn't exactly what I do, but it's similar.
This article explores why nutrient stability is important in a planted aquarium, and how nutrient value fluctuations can result in algae or stunting tips.
That's what you do. (or at least what I do). If I start the week with about 20ppm NO3 and dose a small amount daily. At the end of the week, I have 20ppm. I do a 50% water change which would take me to down to 10ppm. Then I add 10ppm to top back to 20ppm. So my NO3 stays consistent all week at 20ppm. This isn't exactly what I do, but it's similar.
This article explores why nutrient stability is important in a planted aquarium, and how nutrient value fluctuations can result in algae or stunting tips.
Right, makes sense now. I thought you were referring to something like 5 ppm NO3 3 x a week instead of top offs to stay at a target. I haven't been doing the top offs because the tank's consumption is pretty low, but I can start implementing that. Thanks!
This site uses cookies to help personalise content, tailor your experience and to keep you logged in if you register.
By continuing to use this site, you are consenting to our use of cookies.




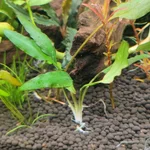
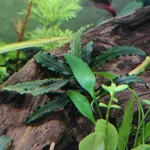
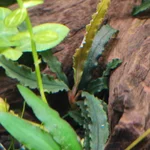
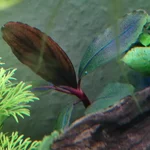




 Also moved it further down now. On the other hand, I learned that crypt nevilii and willisii like high light, so those will be shifted around a bit as well.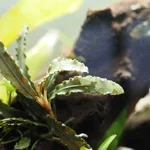


 Turn the lights down to low - moderate, and keep nutrition and CO2 good and steady. Solid new growth will come it's just a matter of waiting it out


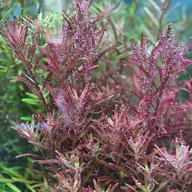

 I should remember to take photos when the algae hits my tank.


