
Welcome to ScapeCrunch
We are ScapeCrunch, the place where planted aquarium hobbyists come to build relationships and support each other. When you're tired of doom scrolling, you've found your home here.
Social Feed

With the algae-free success of my 39gal Experimental Tank, which uses completely inert sand and 100% water column fertilization (no aquasoil or root tabs), I learned so much about the actual science of this hobby.
I found that I really loved having a substrate where I was in full control; where nutrients were neither released nor absorbed, and where the entire water chemistry could be decided by me. And best of all, I've had the most algae-free success of my life with this smaller experimental tank!
Once I was able to start growing a dwarf hairgrass carpet in this completely inert sand, I realized I wanted to try that in my large 150p showcase tank. Welcome to:
In my previous build of this tank, I started with 9 bags of aquasoil, and eventually used almost 12 full bags in this tank:

At $62/9L, I spent ~$750 on the aquasoil necessary to fill the previous setup properly, and that was with using cheap lava rock mesh bags underneath in the back to add height!
To start this setup, I needed a substrate.
In my experimental tank, I used medium grit Black Diamond Blasting Sand (BDBS). Black Diamond is the brand, and Blasting Sand is the inert "coal slag" commonly used in this hobby:

One 50lb bag is approx 3.5gal, or 13.2L.

BDBS and Black Beauty are almost identical. BDBS is a bit darker but BB has a larger consistent
At United Western Denver, I picked up 7 bags (350lbs) for only $76. That's less than $11/bag, or $0.83/L .
In the end, I would only use 5 bags for this tank and return the bags, so it cost me less than $56 for the entire substrate of this aquarium. Versus $750 in aquasoil. I saved almost $700 by using BDBS (!!!!)

7 bags for $76


It often has a dusty, oily residue at first. Rinse REALLY well until it's clear!
1) A much larger Horizontal Reactor
2) A massive 55W HO UV Sterilizer
3) Upgrading to 1" (24/31mm) tubing size, with no choke points, across the entire stand

Tommy, the owner of ARC, let me purchase his original prototype acrylic reactor -- which is almost 50% larger than their regular large size.
The reason for upgrading the horizontal reactor is simple: I don't like running my horizontal reactors in overflow mode.
I prefer getting a guaranteed 100% CO2 injection rate, especially with my flowmeters. It's less confounding variables at play, and I waste less CO2.
However, running a reactor in regulator mode not only requires a really good needle valve, it also can build up a gas pocket over time filled with O2 and N2 gasses. If the reactor is too small, it will need to be purged or the splashing noise inside will drive you crazy.
The larger the reactor is, the smaller this "other" gas pocket is. A larger reactor will either never develop a large gas pocket at it's equilibrium, or helps by extending the lenght of time between manual gas purges required. Not a problem for me, as long as I reach 7+ days before needing to purge the reactor! In the previous setup with the "Large" size, I needed to purge every 5-6 days due to splashing noise.

I 3D printed some custom flanges for the 6" holes in the stand walls to accommodate the reactor.
It also means if I ever want to try a larger tank, like 300 gallons, this can be used for that, too!


It's a bit messy, but it works! 55W of Level 1 sterilization achieved!
This was the hardest part of this build, but I really wanted to give it a try.
The current system is setup with 16/22mm (aka 5/8") tubing. This is standard aquascaping/canister filter size tubing, but I wanted... more flow. MUCH more flow.
The system is setup in this order:

I cannot explain just how much larger these 1" pipes are. They're like police batons. Massive!
Tommy also carries a 1" version of the Netlea Prefilter (which is fucking awesome). It's listed as "22mm" but it's not, it's definitely for 1" tubing:

The final "boss" was the Horizontal Reactor. The adapters are 5/8", and I wanted full 1" tubing to have access.
To fix this, I learned how to solvent weld acrylic plastic with Weld-On 3:
First, I practiced drilling and solvent-welding 1" acrylic tubing into a thick piece of scrap acrylic:


Solvent welding acrylic with Weld-On 3 or Weld On 4 literally makes it one piece of plastic. The sheet will break before the joint does (I tried with a hammer, the sheet cracks before the joint even budges!)
Then, I drilled the reactor's acrylic end caps, and solvent-welded in a 1" piece of pipe as the hose barb:

I drilled another hole for a 1/4" RO line bulkhead to inject the CO2 gas, and capped off the original in/out with a removeable PVC cap:

Ready for use! I will just use 1" hose clamps on the silicone hose to attach it to the reactor.
Yes. It was worth it.
When using a 1-gallon pitcher, measuring multiple times, I'm getting somewhere between 1,300 and 1,500 gallons per hour. That's more than what this pump is rated at, flowing through a prefilter, CO2 reactor AND a UV sterilizer.
Here's a video of the flow. It does not do it justice; this one point of water return will literally uproot plants from the substrate and make the tank like a whirlwind:
My fish will be like

Currently, I have the pump running at about 1/3rd speed (can be adjusted on the pump itself). Who knew that 1" upgrade would be so good? Maybe the standard 16/22mm size is restrictive for larger aquariums.
I found that I really loved having a substrate where I was in full control; where nutrients were neither released nor absorbed, and where the entire water chemistry could be decided by me. And best of all, I've had the most algae-free success of my life with this smaller experimental tank!
Once I was able to start growing a dwarf hairgrass carpet in this completely inert sand, I realized I wanted to try that in my large 150p showcase tank. Welcome to:
Inert Sand Trials, Version 1
One successful inert sand tank could always be a fluke. Two successful inert sand tanks? Now, that's getting serious!Main goals of this tank:
- Prove to myself that my current understanding of DIY fertilization can genuinely work (nothing is provided by the substrate)
- Challenge myself by re-creating the setup with the same hardscape as before, to help with comparisons before and after
- Learn to use an inert, unchanging substrate on a massive gallery-quality setup
- See if inert substrates are really better suited for long-term setups!
- Save some money with an incredibly cheaper substrate setup
- Make 3 major upgrades:
- Larger Horizontal Reactor for running in regulator (NOT overflow) mode
- Massive 55W UV sterilizer
- Upgrading tubing/prefilter/lily pipes/pump size to 1" diameter with no smaller choke points
In my previous build of this tank, I started with 9 bags of aquasoil, and eventually used almost 12 full bags in this tank:
At $62/9L, I spent ~$750 on the aquasoil necessary to fill the previous setup properly, and that was with using cheap lava rock mesh bags underneath in the back to add height!
To start this setup, I needed a substrate.
In my experimental tank, I used medium grit Black Diamond Blasting Sand (BDBS). Black Diamond is the brand, and Blasting Sand is the inert "coal slag" commonly used in this hobby:
One 50lb bag is approx 3.5gal, or 13.2L.
- Aquasoil is approx $6.2/L
- BDBS is approx $1.14/L.
BDBS and Black Beauty are almost identical. BDBS is a bit darker but BB has a larger consistent
At United Western Denver, I picked up 7 bags (350lbs) for only $76. That's less than $11/bag, or $0.83/L .
In the end, I would only use 5 bags for this tank and return the bags, so it cost me less than $56 for the entire substrate of this aquarium. Versus $750 in aquasoil. I saved almost $700 by using BDBS (!!!!)
7 bags for $76
To use Blasting Sand, you need to rinse thoroughly:
It often has a dusty, oily residue at first. Rinse REALLY well until it's clear!
There are also 3 major points of upgrade that this tank will be receiving:
1) A much larger Horizontal Reactor
2) A massive 55W HO UV Sterilizer
3) Upgrading to 1" (24/31mm) tubing size, with no choke points, across the entire stand
Tommy, the owner of ARC, let me purchase his original prototype acrylic reactor -- which is almost 50% larger than their regular large size.
1) Upgrading reactor size
The reason for upgrading the horizontal reactor is simple: I don't like running my horizontal reactors in overflow mode.
I prefer getting a guaranteed 100% CO2 injection rate, especially with my flowmeters. It's less confounding variables at play, and I waste less CO2.
However, running a reactor in regulator mode not only requires a really good needle valve, it also can build up a gas pocket over time filled with O2 and N2 gasses. If the reactor is too small, it will need to be purged or the splashing noise inside will drive you crazy.
The larger the reactor is, the smaller this "other" gas pocket is. A larger reactor will either never develop a large gas pocket at it's equilibrium, or helps by extending the lenght of time between manual gas purges required. Not a problem for me, as long as I reach 7+ days before needing to purge the reactor! In the previous setup with the "Large" size, I needed to purge every 5-6 days due to splashing noise.
I 3D printed some custom flanges for the 6" holes in the stand walls to accommodate the reactor.
It also means if I ever want to try a larger tank, like 300 gallons, this can be used for that, too!
2) Adding a 55W Lifeguard Pro-Max Amaglam UV Sterilizer
I run a 7W sterilizer on my experimental tank, and I had a 14W sterilizer on this 150p tank previously. They are not necessary, but I do find that they help prevent some algae and MASSIVELY improve the water clarity. I thought my water was crystal clear , until I installed the 14W sterilizer on the tank. Since I was upgrading these things, I decided to get a "buy it for life" sterilizer:It's a bit messy, but it works! 55W of Level 1 sterilization achieved!
3) Upgrading to 1" tubing/equipment/lily pipes
This was the hardest part of this build, but I really wanted to give it a try.
The current system is setup with 16/22mm (aka 5/8") tubing. This is standard aquascaping/canister filter size tubing, but I wanted... more flow. MUCH more flow.
The system is setup in this order:
- Intake Lily Pipe
- Prefilter
- Horizontal reactor
- UV Sterilizer
- Optimax return pump
- Return lily pipe
I cannot explain just how much larger these 1" pipes are. They're like police batons. Massive!
Tommy also carries a 1" version of the Netlea Prefilter (which is fucking awesome). It's listed as "22mm" but it's not, it's definitely for 1" tubing:
The final "boss" was the Horizontal Reactor. The adapters are 5/8", and I wanted full 1" tubing to have access.
To fix this, I learned how to solvent weld acrylic plastic with Weld-On 3:
First, I practiced drilling and solvent-welding 1" acrylic tubing into a thick piece of scrap acrylic:
Solvent welding acrylic with Weld-On 3 or Weld On 4 literally makes it one piece of plastic. The sheet will break before the joint does (I tried with a hammer, the sheet cracks before the joint even budges!)
Then, I drilled the reactor's acrylic end caps, and solvent-welded in a 1" piece of pipe as the hose barb:
I drilled another hole for a 1/4" RO line bulkhead to inject the CO2 gas, and capped off the original in/out with a removeable PVC cap:
Ready for use! I will just use 1" hose clamps on the silicone hose to attach it to the reactor.
Was it worth it? Did it really upgrade the flow to change everything to 1" diameter?
Yes. It was worth it.
When using a 1-gallon pitcher, measuring multiple times, I'm getting somewhere between 1,300 and 1,500 gallons per hour. That's more than what this pump is rated at, flowing through a prefilter, CO2 reactor AND a UV sterilizer.
Here's a video of the flow. It does not do it justice; this one point of water return will literally uproot plants from the substrate and make the tank like a whirlwind:
My fish will be like
Currently, I have the pump running at about 1/3rd speed (can be adjusted on the pump itself). Who knew that 1" upgrade would be so good? Maybe the standard 16/22mm size is restrictive for larger aquariums.

75 replies
·
6159 views


Journal Low and Slow
Finally a journal.
I’ll soon be setting up two new tanks, a UNS 90p and a 50c. (Not so!) Patiently awaiting tanks and stands delivery.
They will both be middle energy tanks. I have lengthy periods of busy time and travel that mean the tanks need to survive without human intervention here and there. So plenty of automation is needed, and slow and steady wins over high energy. Or in BBQ smoking terms: low and slow.
Plans:
My last tank has had a rough year. Hurricane Helene meant two weeks with no electricity, and much longer without decent water changes.
Then last summer the tank developed a slow leak while I was out of town (ugh!). Had to fly home for a week to triage. Fish and plants have been in temporary tanks. Plants are struggling. Photo is when they had already been in temporary bin for over 6 weeks, I was surprised it didn’t look like an algae infested swamp.

Sooo ready for my new tanks! These are my first really nice tanks, I’ve only owned petco specials before.
For the new tanks I'm planning on over ordering plants since my surviving plants are clearly pretty weak at this point.
I’ll soon be setting up two new tanks, a UNS 90p and a 50c. (Not so!) Patiently awaiting tanks and stands delivery.
They will both be middle energy tanks. I have lengthy periods of busy time and travel that mean the tanks need to survive without human intervention here and there. So plenty of automation is needed, and slow and steady wins over high energy. Or in BBQ smoking terms: low and slow.
Plans:
- Injected CO2, but less than 30ppm
- Inert gravel
- Tidal HOB filter and partial UGF plate.
- Less than EI ferts, but more than PPS pro.
- Tap water (my tap is 50 TDS and only 10ppm Ca) remineralized to 30ppm Ca and 3-4 dKH.
- Lower light levels: Week aqua L on 90p and Chihiros wrgb 2 slim on 50c.
- Easy slow growing plants, and a few fish. Thinking the 50c will be a shrimp tank.
- Some hardscape but nothing crazy
My last tank has had a rough year. Hurricane Helene meant two weeks with no electricity, and much longer without decent water changes.
Then last summer the tank developed a slow leak while I was out of town (ugh!). Had to fly home for a week to triage. Fish and plants have been in temporary tanks. Plants are struggling. Photo is when they had already been in temporary bin for over 6 weeks, I was surprised it didn’t look like an algae infested swamp.
Sooo ready for my new tanks! These are my first really nice tanks, I’ve only owned petco specials before.
For the new tanks I'm planning on over ordering plants since my surviving plants are clearly pretty weak at this point.
47 replies
·
3335 views

Started a new tank with the idea of show casing Lagenandra meeboldii which I have not showcased before. Wanted to feature Hygrophila lower Hlaingbwe, but I removed it later as I think it would be too large for this tank.
New substrate, new filter, squeezed filter mulm from the other matured tank, then ran the tank one week day before planting. 100% water change after planting, then 100% water change every other day since then. Dosing 1ml APT3 after water change day, and remineralizing to 5dGH using APT Sky. Trying out the low water column dosing approach for the initial period.
Filter: Oase 250
Lights: Week aqua a430 80%
Substrate: APT Feast
Was going to Journal about startup issues, however, it seems like the tank has already stabilized, skipping diatoms and green dust phase.
Freshly planted for a couple of days:
13/2/2026
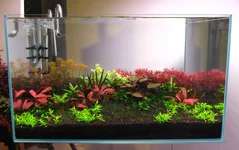
Replanted the tops for Myriophyllum roraima, Cut and replanted Rotala blood red to begin building up the bush form. Trimmed old leaves
Foreground seems a bit blocky for now, so I think I'lll move stuff round again. Probably when the BV grows out some more.
Pic on 23/2/2026
Readings at this stage:
Potassium: 2.3ppm
Ammonia: 0.1ppm
reduce water changes to 2 times a week.

New substrate, new filter, squeezed filter mulm from the other matured tank, then ran the tank one week day before planting. 100% water change after planting, then 100% water change every other day since then. Dosing 1ml APT3 after water change day, and remineralizing to 5dGH using APT Sky. Trying out the low water column dosing approach for the initial period.
Filter: Oase 250
Lights: Week aqua a430 80%
Substrate: APT Feast
Was going to Journal about startup issues, however, it seems like the tank has already stabilized, skipping diatoms and green dust phase.
Freshly planted for a couple of days:
13/2/2026
Replanted the tops for Myriophyllum roraima, Cut and replanted Rotala blood red to begin building up the bush form. Trimmed old leaves
Foreground seems a bit blocky for now, so I think I'lll move stuff round again. Probably when the BV grows out some more.
Pic on 23/2/2026
Readings at this stage:
Potassium: 2.3ppm
Ammonia: 0.1ppm
reduce water changes to 2 times a week.
59 replies
·
4052 views



321 replies
·
17680 views
Looking for a nice-looking 16/22 in/out set for a planted tank.
Preferably durable and with a functional integrated skimmer.
I really like the Aquario Neo Flow V2, but I’ve read that the skimmer can suck in/kill small fish or shrimp. Any good alternatives?
Thanks!
Preferably durable and with a functional integrated skimmer.
I really like the Aquario Neo Flow V2, but I’ve read that the skimmer can suck in/kill small fish or shrimp. Any good alternatives?
Thanks!
17 replies
·
174 views

I’m often out and about working in the field and stumble upon breathtaking examples of often overlooked and under appreciated slices of nature that Florida has to offer.
My neck of the woods is filled with marsh/wetlands ripe with both native and invasive wildlife of all flavors; I want to start a thread where I can document and share.
I’ll update this thread whenever I capture something noteworthy. Much of what catches my eye is aquatic flora, but I try and document anything captivating. I hope you find this as beautiful and fascinating as I do.


My neck of the woods is filled with marsh/wetlands ripe with both native and invasive wildlife of all flavors; I want to start a thread where I can document and share.
I’ll update this thread whenever I capture something noteworthy. Much of what catches my eye is aquatic flora, but I try and document anything captivating. I hope you find this as beautiful and fascinating as I do.
104 replies
·
6474 views
Journal 22 gallon long bookshelf
Time to start a new thread.
I’ll fill in some details later, but I’m working on the hardscape now. Any and all criticism is appreciated. The vision is nothing more, and nothing less, than something appealing to the eye.
90cm x 30cm x 30cm Lifegard Aquatics ultra clear bookshelf tank. Buce and anubias on the hardscape, stems towards the back and center, mid to front carpet with some changes in shade and texture down to a flat grade on the right side of the tank.
Lily pipe inlet and skimmer will be in the back left corner with the outflow in the front left to hopefully achieve circular flow. I’ll be running an in-line diffuser. Light will be the P600 Pro that I regrettably did not upside to 900. Oh well. I’ll mount it high and hopefully it’ll have enough spread.
I have some dragon stone and red lava rock rubble I’ll use at the base to blend into the substrate, as well as some stratum I may or may not cap with.


I’ll fill in some details later, but I’m working on the hardscape now. Any and all criticism is appreciated. The vision is nothing more, and nothing less, than something appealing to the eye.
90cm x 30cm x 30cm Lifegard Aquatics ultra clear bookshelf tank. Buce and anubias on the hardscape, stems towards the back and center, mid to front carpet with some changes in shade and texture down to a flat grade on the right side of the tank.
Lily pipe inlet and skimmer will be in the back left corner with the outflow in the front left to hopefully achieve circular flow. I’ll be running an in-line diffuser. Light will be the P600 Pro that I regrettably did not upside to 900. Oh well. I’ll mount it high and hopefully it’ll have enough spread.
I have some dragon stone and red lava rock rubble I’ll use at the base to blend into the substrate, as well as some stratum I may or may not cap with.
217 replies
·
23315 views
Some of the other terrestrial projects I’m working on. Slowly building towards the halo project, an ebb and flow Florida wetland biotope utilizing a bell siphon for tidal management. These are almost all in my office. The bog biotopes are experiments for emersed growing species that are sensitive to shipping in fully submersed form (Sclerolepis unifloria, for example).


13 replies
·
450 views

Hi everyone, I'm curious. My pH is 0 and my GH is 7. My pH is 5.5/5.6 all day. I use CO2 24/7. My pH drop is 1.6/1.7. I degas the water with an air pump for two hours, then I check every hour until the pH becomes stable. Why does the drop control always stay green? Isn't the pH drop high for a 0KH? Should it be yellow? Or am I wrong? Thank you very much.

10 replies
·
125 views
Hello Welcome, chigos85
Welcome to ScapeCrunch, @chigos85!
We would love to get to know you. Please tell us about yourself. What tank do you have?
We would love to get to know you. Please tell us about yourself. What tank do you have?
5 replies
·
55 views
Journal 40 Gallon Maiden Scape
Well the time has finally arrived for me to begin my first true Aquascape, so this is my Maiden Voyage into the world of Aquascaping if you will. Similar to @Sb1415's "The Beginner scaper journal" I am beginning with more of a vision than a concrete plan and I would love any input, suggestions, and constructive criticisms that you all have to offer. Here is what I'm working with to begin this:
Tank:
40 Gallon Breeder (dimensions: 36" L x 18" W x 17" D)
Lighting:
Netlea AT5S Gen 3 (90cm)
Filtration:
Oase Biomaster 2 600 Canister
Will be using intake & outflow that came w/ the Biomaster for the time being, possibly upgrading to glass or stainless in the future.
Co2:
Green Leaf Aquarium Pro-DS-1 Dual Stage Regulator
GLA Inline Atomic Inline Diffuser
5lb Bottle
Fertilization:
Mixing my own GLA Macros & Micros w/ Plantex CSM+B
Dosing Via Chihiros Dosing Pump w/ Magnetic Stirring base
Substrate:
2 Hr Aquarist APT Feast, Crushed lava rock (for height), accent gravel & decorative sand (seeking suggestions).
Hardscape:
Driftwood: Manzanita
Rock: Gneiss which I collected locally.
Plants:
Currently Being farmed which may or may not end up being used (Any suggestions on pairing, placement, or other considerations would be helpful):
Blyxa Japonica
Hygrophila Pinnatifada
Staurogyne Repens
Pogostemon Helferi
Echinodorus Aflame
Anubias Dragon Claw & various anubias variants
Riccadia Chamedryfolia
Rotala Rotundifolia Vietnam H'ra
Alternanthera reineckii var roseafolia
lobelia cardinalis
Gratiola Viscidula
Buces
Hygrophila Araguaia
Crypt Parva
Cyrpt Lucens
Lagenandra Meeboldii Green
Plants I'm Still Considering: Pogostemon Deccanensis, Limnophila Aromatica, Eriocaulon Breviscapum (if i can source it), Micranthemum 'monte carlo' (grown epiphytically).
Other considerations: Back ground.... either plain black or using frosted white window film and repurposing my Fluval Aquasky light to add a sunset effect to the background.
Water:
Will be using RO water remineralized with 2Hr Aquarist Sky Plus
Goals:
My goal here is not a contest winning tank, but a nature style aquascape that will not require an inordinate amount of maintenance. If I can maintain this with basic weekly maintenance that would be ideal. I would also love to keep this tank set up long term if possible, if I could push to 5+ years before needing to rescape that would be my ideal, but I understand sometimes things just don't work out that way. Plan currently is to finalize my hardscape set up... unsure how long this is going to take but I'm not in a rush.... when I get the hardscape to the point the tank would look great with only my hardscape, then I will move forward with a dark start. All of my driftwood is new, so I will continue the dark start until the white fuzzy mold that will inevitably form on the driftwood finally begins to subside before I begin planting.
In need of suggestions:
The tank will normally viewed at sort of a 3/4 angle from our couch, this would be my primary viewing angle. If you were to view from above I've attached some rudimentary Drawings for illustrative purposes.

I'd love to hear some ideas on how I should maybe think about laying this out. I would like to have a sand foreground (unsure about any defined "sand path" as I'm not really attempting a diorama style scape. These are sort of my options as I understand them, if there are others I'd love to hear about them. Currently leaning toward either a triangle or concave lay out, maybe with a smaller island off to one side. A single centralized Island would probably be my last choice for the simple reason they tend to feel less like a snapshot of nature and more contrived. The green arrows represent the direction of upward slope. If you have any input on how any of these layout may affect flow/ co2 distribution please advise. Would love to hear any input or thoughts on how you all might approach a layout with the above viewing angles.

My rock is dark grey/ to blackish in color, with white striations. This in an example, the white is quartz not lime or calcium. I've tested the rock with HCI and it is non reactive. Currently have some sitting in one of the farm tanks and it has not had any effect on the water parameters.

In terms of decorative sand I've been considering a darker sand to match the rock, maybe BDBS, but also considering maybe just a more natural looking sand. The area where these rocks are found don't have dark dirt around them, just regular looking dirt, this is where I would use the accent gravel to sort of create a transition between the rock work and the sand if I went with a more natural color sand. What are your thoughts?
I will begin posting photos as soon as I have my hardscape arrangement finalized. Thanks for reading and I'm looking forward to sharing this journey with all of you.
Tank:
40 Gallon Breeder (dimensions: 36" L x 18" W x 17" D)
Lighting:
Netlea AT5S Gen 3 (90cm)
Filtration:
Oase Biomaster 2 600 Canister
Will be using intake & outflow that came w/ the Biomaster for the time being, possibly upgrading to glass or stainless in the future.
Co2:
Green Leaf Aquarium Pro-DS-1 Dual Stage Regulator
GLA Inline Atomic Inline Diffuser
5lb Bottle
Fertilization:
Mixing my own GLA Macros & Micros w/ Plantex CSM+B
Dosing Via Chihiros Dosing Pump w/ Magnetic Stirring base
Substrate:
2 Hr Aquarist APT Feast, Crushed lava rock (for height), accent gravel & decorative sand (seeking suggestions).
Hardscape:
Driftwood: Manzanita
Rock: Gneiss which I collected locally.
Plants:
Currently Being farmed which may or may not end up being used (Any suggestions on pairing, placement, or other considerations would be helpful):
Blyxa Japonica
Hygrophila Pinnatifada
Staurogyne Repens
Pogostemon Helferi
Echinodorus Aflame
Anubias Dragon Claw & various anubias variants
Riccadia Chamedryfolia
Rotala Rotundifolia Vietnam H'ra
Alternanthera reineckii var roseafolia
lobelia cardinalis
Gratiola Viscidula
Buces
Hygrophila Araguaia
Crypt Parva
Cyrpt Lucens
Lagenandra Meeboldii Green
Plants I'm Still Considering: Pogostemon Deccanensis, Limnophila Aromatica, Eriocaulon Breviscapum (if i can source it), Micranthemum 'monte carlo' (grown epiphytically).
Other considerations: Back ground.... either plain black or using frosted white window film and repurposing my Fluval Aquasky light to add a sunset effect to the background.
Water:
Will be using RO water remineralized with 2Hr Aquarist Sky Plus
Goals:
My goal here is not a contest winning tank, but a nature style aquascape that will not require an inordinate amount of maintenance. If I can maintain this with basic weekly maintenance that would be ideal. I would also love to keep this tank set up long term if possible, if I could push to 5+ years before needing to rescape that would be my ideal, but I understand sometimes things just don't work out that way. Plan currently is to finalize my hardscape set up... unsure how long this is going to take but I'm not in a rush.... when I get the hardscape to the point the tank would look great with only my hardscape, then I will move forward with a dark start. All of my driftwood is new, so I will continue the dark start until the white fuzzy mold that will inevitably form on the driftwood finally begins to subside before I begin planting.
In need of suggestions:
The tank will normally viewed at sort of a 3/4 angle from our couch, this would be my primary viewing angle. If you were to view from above I've attached some rudimentary Drawings for illustrative purposes.
I'd love to hear some ideas on how I should maybe think about laying this out. I would like to have a sand foreground (unsure about any defined "sand path" as I'm not really attempting a diorama style scape. These are sort of my options as I understand them, if there are others I'd love to hear about them. Currently leaning toward either a triangle or concave lay out, maybe with a smaller island off to one side. A single centralized Island would probably be my last choice for the simple reason they tend to feel less like a snapshot of nature and more contrived. The green arrows represent the direction of upward slope. If you have any input on how any of these layout may affect flow/ co2 distribution please advise. Would love to hear any input or thoughts on how you all might approach a layout with the above viewing angles.
My rock is dark grey/ to blackish in color, with white striations. This in an example, the white is quartz not lime or calcium. I've tested the rock with HCI and it is non reactive. Currently have some sitting in one of the farm tanks and it has not had any effect on the water parameters.
In terms of decorative sand I've been considering a darker sand to match the rock, maybe BDBS, but also considering maybe just a more natural looking sand. The area where these rocks are found don't have dark dirt around them, just regular looking dirt, this is where I would use the accent gravel to sort of create a transition between the rock work and the sand if I went with a more natural color sand. What are your thoughts?
I will begin posting photos as soon as I have my hardscape arrangement finalized. Thanks for reading and I'm looking forward to sharing this journey with all of you.
20 replies
·
1847 views